
PSD to iOS Storyboard UI with XCode and Swift
Convert your PSD to iOS Storyboard UI with XCode and Swift support in minutes. The PSD to iOS conversion is simple and painless with full support for Image Asset mapping, Storyboard Scenes and more. PSD to iOS is an advanced export and will require a general understanding of iOS, XCode and Swift to modify the code.
iOS Storyboards are unique and support a limited number of options. You can create virtually any Storyboard UI, but the power of iOS is in XCode and Swift. Export Kit creates all required code files and assets to import your XCode project and begin your iOS super app - in a snap!
NOTE: iOS supports 3 main screen sizes for iPhone, iPad and AppleTV. You will need to map your target screens in Photoshop.
IMPORTANT: iOS is ALPHA, additional features to come in future updates.Before You Begin
iOS Storyboard UI and XCode are advanced exports and will require customizations in the code to make the iOS app functional. Each platform of iOS is slightly different and may require advanced knowledge of XCode to correctly configure specific environment options.
ALPHA RELEASE: We currently have official support for iOS ONLY. Additional screen support to come.IMPORTANT: Your project and page names must start with aletterand use[a-z0-9_.]- lowercase letters and numbers only.
IMPORTANT: iOS 8 introduced the concept of Content Margins.
PSD to iOS Storyboard UI with XCode and Swift
This guide will show your custom iOS Storyboard UI and XCode from your PSD to iOS UI export.
Step 1: iOS UI Design

You can create any iOS UI design but you should note the size of the device you are targeting. A common iOS project for iPhone has a set size of 600x600. You must create a PSD document this size to correctly emulate the XCode project.
REQUIRED: Your PSD design must be 600x600 px.REQUIRED: You must create a ${css|screen:default} folder.TIP: KISS - Keep it simple, the UI should have only the elements required to render. Let XCode and Swift do the rest!
Element Rendering

Export Kit will convert your PSD layers to iOS Storyboard elements with relative positioning to its respective parent element. You designs will render WYSIWYG (What you see is what you get), this means you must target the correct device screen size to get pixel-perfect translation of your PSD to iOS Storyboard elements for XCode.
IMPORTANT: iOS 8 introduced the concept of Content Margins.
NOTE: Photoshop and iOS both render elements differently, and have different support for effects. Some Photoshop styles may not render the same visually in iOS - we will fix this in future versions.
Content Margins
All Views in iOS 8+ have a default Content Margin applied to each element. This margin will clip the sub-views (child layers) of the element when placed within the margin. It is important to use ${skip} margins or content backgrounds to add custom constraints to your View for an optimized display.
Color Rendering
Colors in iOS use calibratedRGB which is NOT THE SAME as Photoshop RGB, this means that some colors will not render as expected and may require tweaking.
Example Color Node
1 | <color key="textColor" red="0" green="34" blue="145" alpha="1" colorSpace="calibratedRGB" /> |
IMPORTANT: Your colors may not render the same in iOS as Photoshop, convert problematic layers to Smart Objects.
Image Rendering
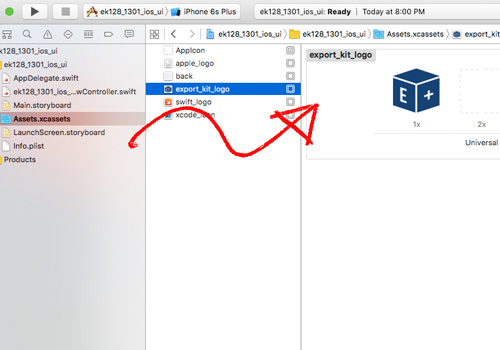
ALPHA RELEASE: Currently Export Kit will only render the 1x version of each image. In a future release Export Kit will render 1x, 2x and 3x images.Images are rasterized and rendered as-is. Your image will size according to the target screen and will render in the Assets folder. Each image file saves with its respective Contents.json description file.
IMPORTANT: iOS has specific rules for image names, you CANNOT USE "-" (dash) in your layer name.
my image name = GOOD
myImageName = GOOD
my_image_name = GOOD
my-image-name = BAD (no dash)
Shape Rendering
ALPHA RELEASE: Support for XCode shapes and paths will come in a future release.
iOS does not have full support for native shapes in Storyboard.
Text Rendering

ALPHA RELEASE: Support for XCode text properties will come in a future release.
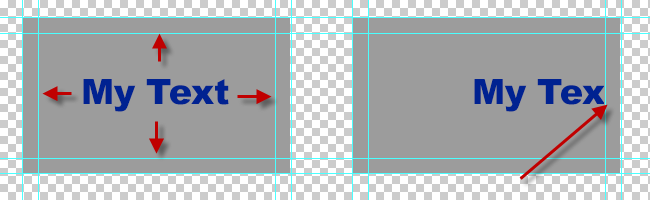
iOS does not have full support for native text styles in Storyboard. There are special rules for processing text with iOS due to iOS 8+ Content Margins. You MUST use Paragraph Text and draw the area of the text layer slightly larger than the expected size.
IMPORTANT: iOS will add a Content Margin and clip your text if you do not draw the text area slightly larger than the expected size.
Font Rendering
You will have to manually add your required fonts into your iOS project. In future versions we will import them from you.
Step 2: Page Scenes

You can create an unlimited number of iOS Storyboard Scenes from your PSD design with Export Kit. Each Storyboard Scene will maintain a layout and Swift ViewController file.
IMPORTANT: Your project and page names must start with aletterand use[a-z0-9_.]- lowercase letters and numbers only.
RULE: You must have content in your main Storyboard Scene.
Swif ViewControllers
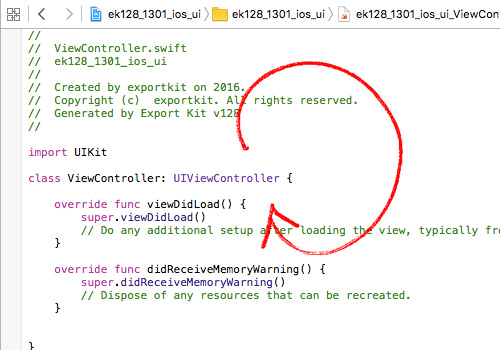
ALPHA RELEASE: Currently Export Kit will only render a basic ViewController, in a future release we will include IBOutlet and IBAction for elements.
All ${page} folders convert to respective Swift ViewController in the PSD to iOS output. Your Swift ViewController files will reference all the layer elements contained in the iOS Storyboard layout file.
Step 3: Before You Export
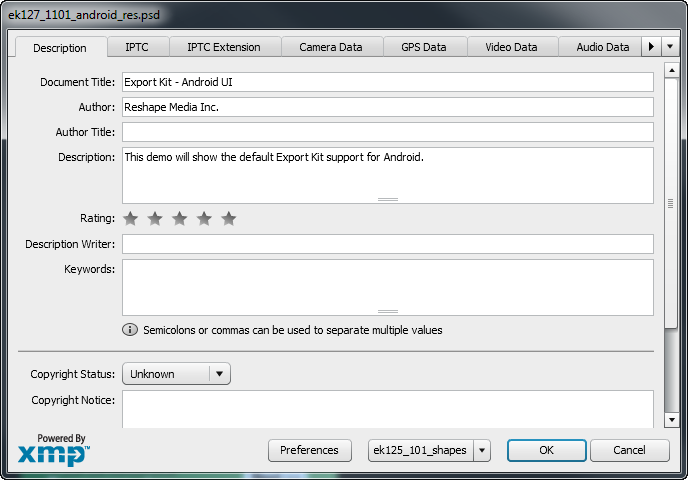
Your PSD document meta is used in your iOS UI output. In future updates we will provide support for additional PSD file info properties.
PressCtrl + Shift + Alt + ito access the Photoshop document meta, or go toFile > File Info.
You're almost there - pixel perfect iOS Storyboard UI with Swift and XCode - in minutes!
Avoid Output Errors
Make sure you read and understand our PSD Design Rules and Layer Naming Rules to avoid visual errors in your Output.
Make sure you read and go over our Before You Export Check List to avoid functional errors in your Output.
BUG: .xcodeproj cannot be opened ... cannot be parsed.
FIX: Your project name must start with a letter
FIX: Use lowercase letters, numbers and "_" underscore
BUG: Images did not load correctly
FIX: Remove "-" (dash) from image layer names
BUG: Images from previous exports are included
FIX: Delete the ftml-www folder and re-export
BUG: Elements render incorrectly/clipping FIX: Draw extra space in the Paragraph text area FIX: Create a ${skip} margin for the folder
Export Kit Settings
Export Kit allows you to customize your Output with Layer Options and Output Options before you export to personalize your project.
NOTE: iOS works out-of-the-box.
Average Export Times
4 - 6 min= Single Scene App8 - 12 min= Multi-Scene App (4 Scenes)14 - 20 min= Multi-Device/Scene App (3 devices)
If The Export Stops – You Stop!
Export Kit will cancel an Output if it finds an error in the Photoshop layer. If Export Kit cancels / stops the Output, what you should do is:
- Note the layer the Output canceled on
- This is the layer
causing the issue, read: No Empty Layers - This is only for you to
note the layer, anddebug the problem DO NOTsave the document,CLOSEthe document andREOPENit- Fix the problem,
SAVEand re-export it
Step 4: Import Your XCode Project

Export Kit will provide you with a full XCode-ready iOS project to import. You will need to have the required iOS XCode IDE to both modify and compile the output files.
Quick Import Steps:
- Open XCode, press
File > Open - Navigate to your iOS output folder
- Open the
XCode project file
Preview with Storyboard Layout

All PSD to iOS Storyboard UI outputs are rendered as-is for preview in the iOS Storyboard Layout viewer. You will see right-away you PSD conversion to pure iOS Storyboard elements with most layer properties intact.
You can edit properties and elements using either iOS Storyboard viewer or your Swift ViewController. Each Scene in your Storyboard will give you access to the respective elements from your design.
NOTE: Photoshop and iOS both render elements differently, and have different support for effects. Some Photoshop styles may not render the same visually in iOS - we will fix this in future versions.
Tweaking Your Images
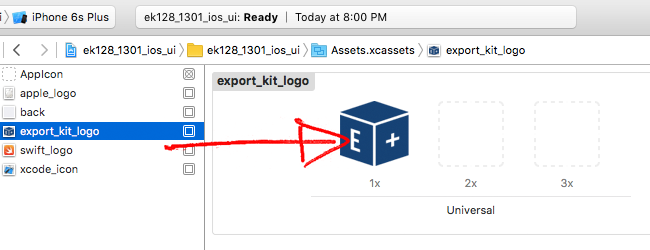
Depending on your PSD image settings for dpi, you may want to re-export some images with the correct dpi settings respective of the target device.
Step 5: Now Build Your Super App
At this point your PSD to iOS Storyboard UI is ready to compile and test. All your assets, class elements and layouts are ready to go. That’s easily weeks to months worth of work, ask your self: “Self, if I export a byte from Apple, will it look like the logo?“
ALPHA RELEASE: Please report all bugs and errors, or send us any feature request - click here.
