
Convert XD to Android Studio XML and Java
Your First XD to Android Studio Export
XD to Android Studio conversion is extreemly fast and simple to create. Android exports support custom styles, multi-device, Java code, and more. XD to Android Studio is an advanced export and will require a general understanding of Android and Java to modify the code.
IMPORTANT: The default screen size for Android is 385px, you must resize your artboard to match.TIP: Learn How to use Export Kit with XD and start to experience awesome in seconds.
IMPORTANT: Android supports many screen sizes and devices, you will need to map your design to your target devices in XD.
Before You Begin
Android XML UI and Java are advanced exports and will require customizations in the output to make the Android app functional. We recommend you use as many target screens as possible to target multiple Android devices, and Export Kit will handle all of your Android resources in the output.
TIP: You must use as many folders as possible to organize your UI/UX into stacked layouts. Your design should match the size of your target screen.IMPORTANT: (a) Android usesDPI(b) XD uses a customAdobe Pixel- they areNOT THE SAME- learn more.
Element Rendering
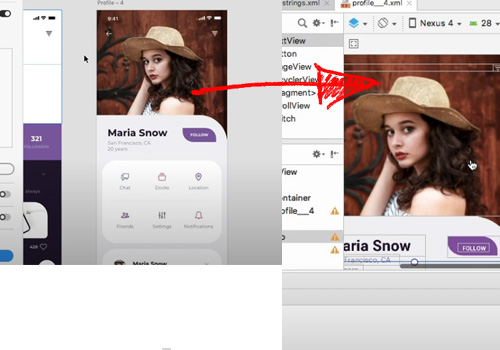
All XD layers translate to native Android XML elements with relative positioning to its respective parent element. Target any Android device screen directly from XD. Your designs will render WYSIWYG (What you see is what you get), and will map all element layouts to the target device screen. This will give you pixel-perfect translation of your XD to android XML elements.
IMPORTANT: Android does not support(-) negativemargins. Your design must start at0,0.
Color Rendering
All colors are stored as values is your Android resources folder. This makes it easy to manage your colors and styles from a single location.
Example Colors Values Resource
1 2 3 4 5 6 7 8 9 10 11 12 13 14 15 16 17 18 | <?xml version="1.0" encoding="utf-8"?> <resources> <!-- ek127_1101_android_res colors --> <color name="take_a_look_at_the_value_of_the_text_items_in__your__strings_xm_color">#000000</color> <color name="red_shadow_color">#FB0000</color> <color name="header_bg_copy_3_color">#657926</color> <color name="regular_text_color">#010101</color> <color name="rectangle_1_copy_2_color">#FF0000</color> <color name="rectangle_1_copy_4_color">#0042FF</color> <color name="drop_shadow_color">#2FD1B1</color> <color name="xd_to_android_ui_color">#FFFFFF</color> <color name="rectangle_1_copy_4_1_color">#6000FF</color> <color name="blue_box_color">#003366</color> <color name="rectangle_1_copy_4_2_color">#00FFAE</color> <color name="color_overlay_1_color">#FCFF00</color> <color name="rectangle_1_copy_3_color">#F6FF00</color> </resources> |
Image Rendering
Images are rasterized and rendered as-is. Your image will size according to the target screen, if no target screen is defined then the image is treated as a nodpi element.
Shapes and SVG Rendering
Export Kit will convert Shape Elements from your XD design directly into native Android shapes. There are no special settings required for processing shapes. Optionally you can select “SVG” in your customize settings, and all shapes will process as native Android SVG elements.
Example Shape XML Resource
1 2 3 4 5 6 7 | <?xml version="1.0" encoding="utf-8"?> <!-- rectangle_1_copy_4_3 from your XD file. --> <shape xmlns:android="//schemas.android.com/apk/res/android" android:shape="rectangle" > <stroke android:color="#000000" android:width="3dp" /> <solid android:color="@color/xd_to_android_ui_color" /> </shape> |
NOTE: All shapes are stored as nodpi resources, regardless of the target screen.Text Rendering
IMPORTANT: Android Studio 4x requires Play Services to use Google Fonts, learn more: https://developers.google.com/fonts/docs/android.
TIP: To use the default Android font, disable theWeb Fontsoption in theCustomizesection of the plugin.
Export Kit has great Text Support for justification for left, center and right; including various character styles and paragraphs. There are no special settings required for processing text, select the text tool, your font and settings; Export Kit will do the rest.
Example String Values Resource
1 2 3 4 5 6 7 8 | <?xml version="1.0" encoding="utf-8"?> <resources> <!-- ek127_1102_android_screens strings --> <string name="app_name">Export Kit App</string> <string name="ek_img_content">XD Image</string> <string name="xd_to_android_ui_string">XD to Android Studio</string> </resources> |
NOTE: All text content is stored as string values in the resources folder.Special Characters
Android treats Text very differently regardless of your character settings. Because the text is in the string files, we recommend you use the ASCII value of your text.
You can google “ascii to Unicode converter“, or “ascii to utf8 converter” and you should find a few resources that can convert blocks of text. You can then use the converted text string in your XD design and you should be good-to-go!
String Resource Guide
Please read the Official Android String Resource Guide – you will find a lot of useful information regarding the CORRECT usage of strings. Some characters you need to escape, while others you may need to enclose in double quotes (“).
Escaping Strings
1 2 3 4 5 6 7 8 9 10 11 12 13 14 15 16 17 | This\'ll work -- OK "This'll also work" -- OK This doesn't work -- Causes a compile error This is a \"good string\". -- OK This is a "bad string". -- Quotes are stripped; displays as: This is a bad string. 'This is another "bad string".' -- Causes a compile error |
Font Rendering
You will have to manually import your required fonts into your Android project. In future versions we will import them from you.
Custom Android Styles

Using our CSS Style and Styles tags you can create custom run-time styles for Android that will render with elements when compiled. This makes it easy to reuse styles and themes when creating your Android projects.
Android Widgets
Create your Android widget layouts in your design, then render the native Android widgets in your export. Your widget will render with the size, position and effects applied to the layer. We recommend using Shapes to create widgets – when using other Layers, the properties of the layer are copied.
Artboard Activities
You can create an unlimited number of Android Activities from your XD design with each Artboard. Each activity will maintain a layout and Java file referencing each element in the layout.
RULE: Your project and page names must use [a-z0-9_.] - lowercase letters and numbers only.RULE: You must have content in your main Project Activity.
XML Activities

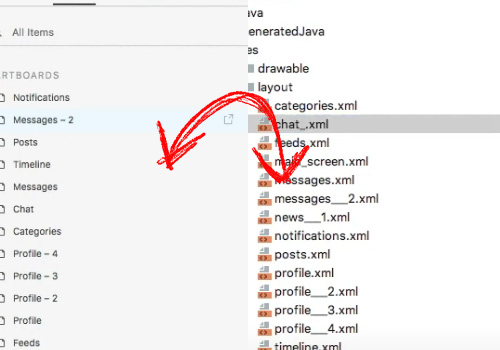
All elements in your XD design are converted to clean Android XML UI, with reference to all layer properties. Each Activity will create an individual layout XML file with all XD layer elements within the respective Artboard.
Note: Some properties such as strings, images, and colors are linked to other resources files.
Note: If you have multiple target screens, then you will have one layout XML file per screen.Java Classes

All Artboards convert to respective Java Activities in the XD to Android Studio output. Your Java files will reference all the layer elements contained in the Android XML layout file.
Note: You will have one Java Class per Artboard regardless of the target screens.Navigate Between Activities
Use our Link Tag to connect Activities and allow the end-user to navigate your Android app via native Intents. Links can be used with any XD layer and will change the current Android Activity to the supplied link Activity.
NOTE: You do not need to add extensions to links, just use the page/activity name and Export Kit will reference the Activity.
EXAMPLE: If you have an Artboard nameduser_homethen you can use${link:user_home}in another Artboard to connect the two.
Target Multiple Devices
Target unlimited XD to Android devices from a single XD file with our CSS Screen Tags. Each target screen will generate an individual layout and drawable folder for the screen assets, but only one Java Activity is required per Android layout.
You should have an idea of the screens you are targeting and their DPI settings before you create your XD design for multiple Android screens. Each device you target should have a CSS Screen reflective of the device size.
| Screen Size | Design Size |
|---|---|
| ${css|screen:1440} | 383 px |
| ${css|screen:1280} | 1280 px |
| ${css|screen:960} | 1023 px |
| ${css|screen:840-land} | 853 px |
| ${css|screen:840} | 899 px |
| ${css|screen:720} | 800 px |
| ${css|screen:600} | 593 px |
| ${css|screen:480} | 533 px |
| ${css|screen:400-land} | 800 px |
| ${css|screen:400} | 595 px |
| ${css|screen:360-land} | 592 px |
| ${css|screen:360} | 385 px |
| ${css|screen:320-land} | 592 px |
| ${css|screen:320} | 320 px |
NOTE: Images will auto-resize to the correct layout and drawable size.
Avoid Output Errors
Make sure you read and understand our XD Design Rules and Layer Naming Rules to avoid visual errors in your Output.
Make sure you read and go over our Before You Export Check List to avoid functional errors in your Output.
BUG: Text does not display FIX: DisableWeb FontsinCustomizeto use default fonts, or install Play Services and use Google Fonts.
BUG: Images and Text did not load FIX: Opencolors.xmlandstrings.xmland ignore the language warnings
BUG: No resource found that matches... (at 'text'
FIX: Use the ASCII value for your string
BUG: Elements are positioned at 0,0 FIX: Android does not allow for negative (-) margins
BUG: Resource entry XXXXX is already defined
FIX: Use unique names with your layers
BUG: Invalid file name: must contain only [a-z0-9_.]
FIX: Use lowercase letters and numbers with your names
