
Using Tools Panel

Tools Kit is designed to give you quick access to common tools required to speed up both your design and export time. To select Tools Panel, click Tools in the top navigation menu of the Export Kit.
Layer Names
Get quick access to change and validate layer names on-the-fly.
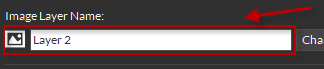
Step 1: Change Your Name
Select your desired layer and Tools Panel will auto-load the layer name, you can manually change the layer name and apply your changes by clicking the Change button.
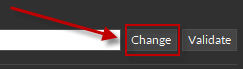
Step 2: Validate Your Name

You can also validate the layer name by clicking the Validate button, this will change the layer name to a safe name for use with all environments.
EXAMPLE:my Sup3r L@yerconverts tomy_sup3r_l_yer.
Layer Tags
Quick and easy reference to the general Export Kit Layer Tags library, with notes and references for each type and arguments.
More Info
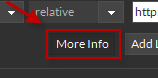
Click the More Info button anytime for a reference to the tag or type information.
Step 1: Select a Tag

Select any tag from the dropdown menu. Each tag is unique and will provide functionality based on the individual tag.
Step 2: Select a Type

Each tag has unique features, if the tag supports a type, you will have access here to the available types.
NOTE: Some tags offer additional types beyond those found in the list.
Step 3: Add Your Arguments
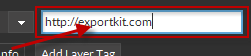
If your tag supports arguments, you can manually add any valid argument for use.
Step 4: Add Your Layer Tag
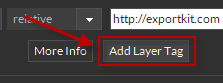
When ready, click the Add Layer Tag button. This will add the Layer Tag to the start of your layer name. You can nest tags, but you are limited to the max length of your PSD, AI or INDD layer name.
Learn more about Layer Tags.
UI Builder
A custom Drop-and-drag PSD UI builder for PSD, AI and INDD. Point-click-drag, then arrange and order the design blocks to create unlimited, unique designs. You can create your own element set, or use any of our pre-built UI Elements.
IMPORTANT: You must install the default ftml-data before using the UI Builder.
Step 1: Select a Library
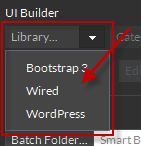
Select the library of UI elements you wish to access. This content will sync with Export Kit from your User Data Folder each time you login.
Step 2: Select a Category

Categories are unique to each library based on your User Data Folder structure. This makes it easy to organize your various design elements.
Step 3: Select an Element

You can now select any UI Element found in the category.
Step 4: Add or Edit the Element
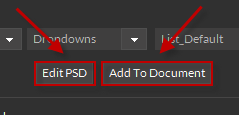
Once you have selected your UI Element, you now have the option to add the element to your current document – otherwise edit the PSD, AI or INDD file.
Batch Processing
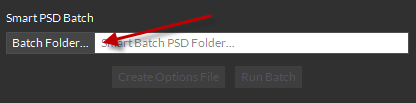
Smart PSD Batch makes it easy to convert 100s of PSD files to any active Export Environment. PSD Batch processing uses all Export Kit options so there are several guides you should read before running a batch.
Learn more about Batch Processing PSD Files.
