Create a Navigation Menu
Export Kit makes PSD Navigation Menus and links a simple task. Nav Menus are a group of anchor links used to direct users to both internal and external pages. Nav Menus are involved in all common designs for both websites and applications. You can create navigation menus in a few easy steps with Export Kit.
Step-By-Step Video
Need a visual? Watch our step-by-step tutorial!
Step 1. Design Your Menu
Add your menu design to the PSD Document.

Your menu design should reflect how a menu is coded and not how you visualize a menu. Keep in mind a menu is used to give users navigation points, so do not use a single text block to create a nav menu.
You must design your menus to reflect the number of navigation items you require. Eg. if you need 4 nav links, then you must create 4 individual elements in your PSD design.
Do Not Use Paragraph Menus
COMMON MISTAKE: Its very common for designers to draw the area of the nav menu with paragraph text >> then write the nav menu labels in the single text block.Consider a nav menu will require individual buttons to navigate to each page link. You will need an individual text layer per button to correctly place links and organize your content. When you use a sinlge paragraph block for your menu, you are forcing all actions to reflect ONE object.
Step 2. Add Links
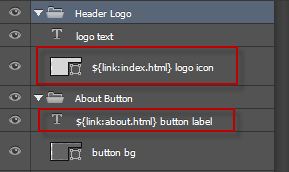
Use Link Tags for layers,
eg. ${link://google.com}
Add the Link Tags to the layers you want to use as buttons. Once you add the tags, each layer will become a native button in the Output. When selected, the user will navigate to the supplied url based on the Link Tags.
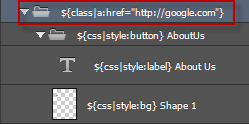
Use Class Tags for folders,
eg. ${class|a:href="//google.com"}
We strongly recommend you add your Class Tags as the PARENT folder of your elements, this will maintain your element properties.
Working With Folders

Remember with folder groups, you can still control the mouse actions (over, out, click, etc.) of the folder object in code after the export. The link will preset the elements you want as web links.


