
Convert XD to WordPress Theme
Your First WordPress Export
Convert a XD to WordPress Themes in a few minutes. Export Kit makes your XD to WordPress theme conversion quick and easy, with full support for custom WP CSS styles and Admin options. XD to WordPress is an advanced export and will require a general understanding of WordPress.
Before You Begin
WordPress themes are an advanced output that will require customizations. We recommend you use as many folders as possible when designing your XD to WordPress theme to maintain the correct WP theme template structure.
✱ NOTE: This is a complete guide to building a FULL XD to WordPress theme with many options, so sit back - relax - get ready for awesome!Step 1: Header.php
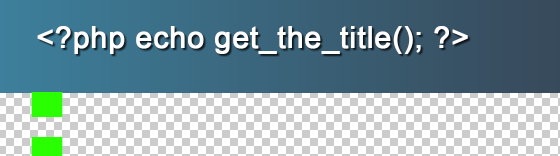
header - Artboard onlyThis folder will render the WordPress header.php file based on your XD design. A typical WordPress header design will likely have a few navigation elements, a logo and possibly title/description. The header is used by WordPress to create the initial HTML doctype, meta and body tag.
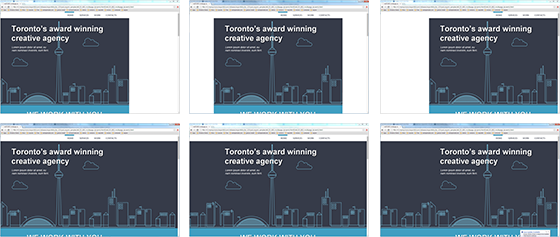
Example Header Design

✱ NOTE: WordPress recommends you: (a) addblog information(b) add anavigation menu
Blog Informaiton (bloginfo)
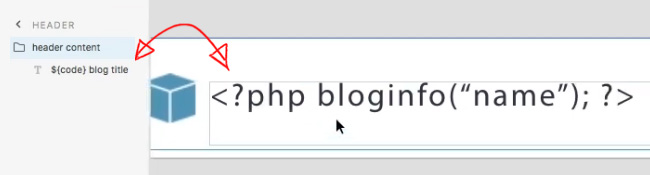
WordPress provides you with many options for blog information, but with a header you are likely to use the Blog Name and possibly the Blog Description in your header design.
✱ NOTE: Use${code}tag to add custom PHP to your XD text layers, eg.<?php bloginfo("name"); ?>
Navigation Menu
This is a *SMART* tag and will use the layers within the XD folder as objects in WordPress. This tag will generate a list of WordPress navigation items and a custom admin menu. The menu name you assign will generate in the Admin menu options.
${wp_nav_menu|[DIRECTION]:[MENU_NAME]} - Folder onlyusage: ${wp_nav_menu|h:Header Menu}✱ NOTE: You can choose a horizontal menu with "h", or vertical with "v" in the direction.Navigation Menu Item
When you create navigation items for your menu, you only need to create a single menu object with a label and background layers.
✱ NOTE: Use CSS Style Tags to control the navigation: (a)${css|style:label}- Text layer (b)${css|style:bg}- Shape layer
WordPress will reuse these objects when rendering each menu item on your website. Using CSS Style Tags with the single menu item will give you visual control of all menu items.
Menu Item Name

WordPress has rules when requesting menu items, and specific characters used to render item names: “%3$s“. These characters must be included in the label text content, otherwise the menu item name will not display.
⛔ IMPORTANT: You must include "%3$s" in the text content or the menu item namewill notrender.
Menu Size
You will need to include the size of your menu in the XD design. You cand do this by adding a shape layer in the ${wp_nav_menu} folder's parent, and adding ${skip} to that shape so it is not rendered.
Step 2: Footer.php
footer - Artboard onlyThis folder will render the WordPress footer.php file based on your XD design. A minimal WordPress footer should have additional navigtion menus and a logo. The footer is used by WordPress to close the html tags when rendering the page.
Step 3: Index.php
index - Artboard onlyThis folder will render the WordPress index.php file based on your XD design. The index.php file acts as the base loop for WordPress pages if no other templates are available.
This file is the default file used to render your WordPress website homepage if you do not explicitly set one in the admin.
You can mix and match your WordPress loop with your static template design to personalize your theme. All design elements in your XD fill will convert to your WordPress HTML webpage.
Example Index Static Design

Your static content will render pixel-for-pixel in the output. Convert any XD design to static content anywhere in WordPress. Although you can design your entire site using static content, note that WordPress is a dynamic system with a strong backend – get dynamic!
✱ NOTE: You can define WordPress content with layer tags.
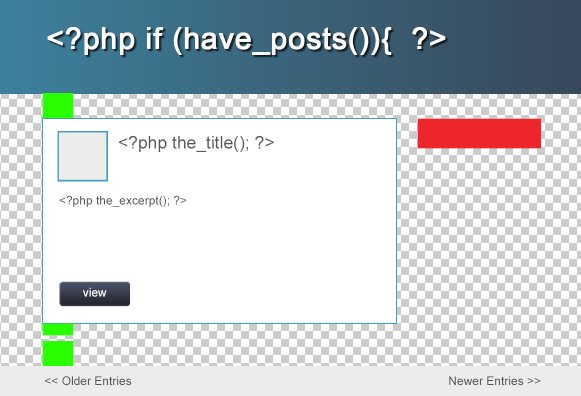
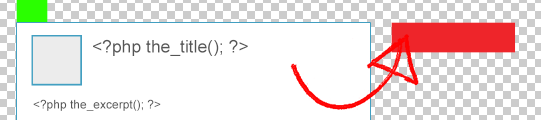
Example Index Loop Design
✱ NOTE: This example uses the ${div|posts} tag to enable a Custom Loop.The index page of a WordPress blog is often an “Archive” of posts. This means that WordPress is likely to return a list of posts/pages if you are using a Default Loop – or each post/page content if you are using a Custom Loop.
Export Kit offers many options to work with the WordPress loop. Along with Conditional Loops, you can also add conditional modules to each loop item.
⛔ IMPORTANT: You must use ${fix} to clear your loop and add padding to each loop item.⛔ IMPORTANT: You must use the correct WP tags to enable the respective WordPress loop.
The Index Loop
When using Custom Loops you will need to add each post/page property individually in your XD file. Export Kit will use your XD layout to generate the correct WordPress loop objects, and render the WordPress property using your XD layers.
${code} - Text Only - Allows for raw PHP in layers, including native WordPress Functions.${thumbnail} - Shapes Only - Renders the post/page thumbnail using the size of the layer.${link:<?php the_permalink(); ?>} - Layers Only - Add a web link to the post/page url.Conditional Modules
WordPress offers additional display options for loop items depending on the post/page data. These conditions allow you to display individual page views based on each condition, otherwise the page will use the default loop.
This applies to Folder layers only.
Thumbnails
${div|has_post_thumbnail} - Renders childs layers only if the post/page has a thumbnail. ${div|no_post_thumbnail} - Renders childs layers only if the post/page does not have a thumbnail. Comments
${div|comment_not_approved} - Renders child layers only if the comment is not approved by an Admin.${div|comments_open} - Renders child layers only if the comments are open.${div|comments_close} - Renders child layers only if the comments are open.${div|have_comments} - Renders child layers only if post/page has comments.${div|no_comments} - Renders child layers only if post/page does not have comments.Step 4: Single.php
single - Artboard onlyThis folder will render the WordPress single.php file based on your XD design. The single.php file acts as the base page for WordPress loops that output a single list item, ie. a post.
The single.php file is very structured as WordPress has a few recommended properties that you should include in your XD theme design.
Example Single Design
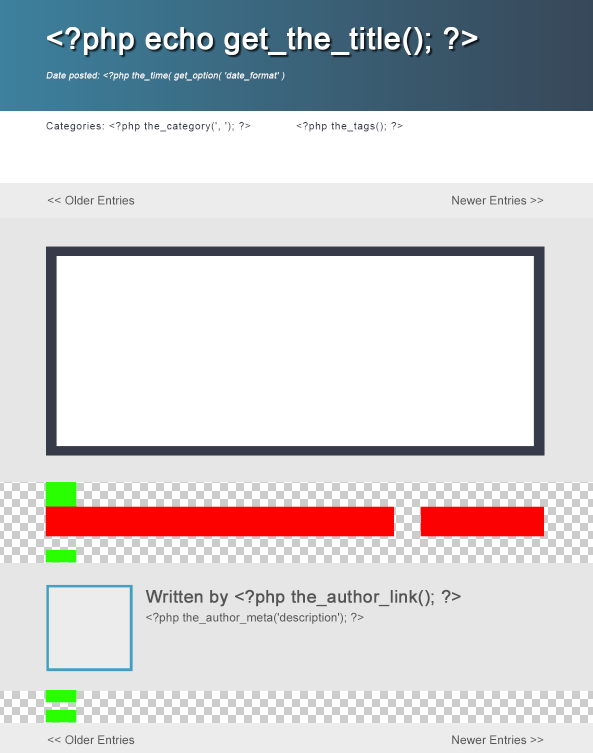
✱ NOTE: This example uses the ${div|entries} tag to enable a Default Loop.✱ NOTE: WordPress recommends you: (a) Display thepost content(b) Displaypost titlein plain text (c) Display thepost dateand respect the date format settings (d) Display theauthor info(e) Displaycategories and tags(f) Displaycomment list and form(g) Display"Edit" linkfor logged in users with permission (h) Show navigation links tonext and previousposts
Post Title and Date

Use a mix of text content with ${code} tags to create the post title and date in your WordPress theme output.
${code} - Text Only - Allows for raw PHP in layers, including native WordPress Functions.Categories and Tags

Use a mix of text content with ${code} tags to create the categories and tags in your WordPress theme output.
${code} - Text Only - Allows for raw PHP in layers, including native WordPress Functions.✱ NOTE: Use Paragraph Text to draw the size of both the Categories and Tags - this size will dictate the max number of categories or tags displayed.
Navigation Links
The text content of each layer will be used as the label in the nav link.
${next_posts_link} - Text Only - Renders a link to the next Post/Page ${previous_posts_link} - Text Only - Renders a link to the previous Post/Page Conditional Thumbnails
The thumbnail is used to display the post/page image. This is conditional because not all posts will use a thumbnail image, so we recommend you design with this in mind by using a conditional module.
${thumbnail} - Shapes Only - Renders the post/page thumbnail using the size of the layer.${div|has_post_thumbnail} - Folders Only - Renders childs layers only if the post/page has a thumbnail. ${div|no_post_thumbnail} - Folders Only - Renders childs layers only if the post/page does not have a thumbnail. The Single Loop
The loop on a single post/page will typically be a Default Loop. WordPress will render the content on a single post/page using the formatting settings of the post. Because this content can change in height, we use a Rectangle shape to draw the size and position of the containers.
${the_content} - Shape or Empty Only - Renders the post/page content in raw HTML. ${get_sidebar} - Shape Only - Calls the native WordPress sidebar. Using ${the_content} and ${get_sidebar} allow you to dynamically create multi-column support in your XD file. This is great for adding template pages with various styles.
⛔ IMPORTANT: You must use ${fix} to clear your loop and add padding to content.Author Info
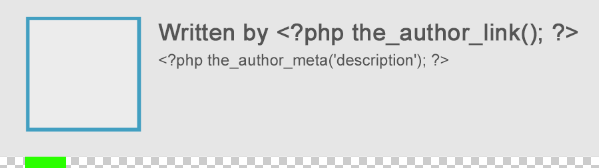
Use a mix of text content with ${code} tags to create the author meta info in your WordPress theme output.
${code} - Text Only - Allows for raw PHP in layers, including native WordPress Functions.${get_author_avatar} - Shape Only - Renders the post/page author's avatar image. ${link:<?php the_author_link(); ?>} - Layers Only - Add a web link to the post/page author url.⛔ IMPORTANT: You must use ${fix} to add padding to the author info.Step 4: Page.php
page - Artboard onlyThis folder will render the WordPress page.php file based on your XD design. The page.php file acts as the base page for WordPress loops that output a single list item, ie. a page.
The page.php file has a minimal structure as WordPress only recommends some properties that you should include in your XD theme design.
Example Page Design
✱ NOTE: This example uses the ${div|entries} tag to enable a Default Loop.✱ NOTE: WordPress recommends you: (a) Display thepage content(b) Displaypage titlein plain text
✱ NOTE: Optional: (c) Displaycategories and tags(d) Displaycomment list and form(e) Display"Edit" linkfor logged in users with permission (f) Show navigation links tonext and previousposts
The Page Loop
Page designs are often unique, or built on a custom template. Most page templates are minimal in design allowing for the page content to drive the visual rendering.
${get_content}, this will use the “Entry Width” in your admin options for the size of the content.Step 5: Archive.php
archive - Artboard onlyThis folder will render the WordPress archive.php file based on your XD design. The archive.php file acts as the base page for WordPress list results, before the index.php file. Archives will become the default page for categories, tags, date-based, author, and search results – if no other templates are specified.
The archive.php file has a minimal structure as WordPress only recommends some properties that you should include in your XD theme design.
Example Archive Design
✱ NOTE: This example uses the ${div|posts} tag to enable a Custom Loop.✱ NOTE: WordPress recommends you: (a) Display thearchive title(b) Display alist of posts/pages(c) Show navigation links tonext and previousposts
Archive Title

Due to the dynamic nature of the Archives, WordPress recommends you strucutre your title to display based on the query type (tag, category, date-based, or author archives).
Example Archive Title Text Content
1 2 3 4 5 6 7 8 9 10 11 12 13 14 15 16 17 18 19 20 | <?php if (have_posts()){ ?> <div class="archive-title"> <?php $post = $posts[0]; if (is_category()) { ?> Entries in <?php single_cat_title(); ?> Category <?php } elseif( is_tag() ) { ?> Posts Tagged ‘<?php single_tag_title(); ?>’ <?php } elseif (is_day()) { ?> Archive for <?php the_time('F jS, Y'); ?> <?php } elseif (is_month()) { ?> Archive for <?php the_time('F, Y'); ?> <?php } elseif (is_year()) { ?> Archive for <?php the_time('Y'); ?> <?php } elseif (is_author()) { ?> Author Archive <?php } elseif (isset($_GET['paged']) && !empty($_GET['paged'])) { ?> Blog Archives <?php } ?> </div> <?php } ?> |
${code} - Text Only - Allows for raw PHP in layers, including native WordPress Functions.Navigation Links
This will add pagination to the archive results.
${next_posts_link} - Text Only - Renders a link to the next Post/Page ${previous_posts_link} - Text Only - Renders a link to the previous Post/Page Conditional Thumbnails
You may want to display your post/page thumbnails in your archives, to do this you will need to add conditional thumbnails to maintain a flexible design.
${div|has_post_thumbnail} - Folders Only - Renders childs layers only if the post/page has a thumbnail. ${div|no_post_thumbnail} - Folders Only - Renders childs layers only if the post/page does not have a thumbnail. The Archive Loop
When using Custom Loops you will need to add each post/page property individually in your XD file. Export Kit will use your XD layout to generate the correct WordPress loop objects, and render the WordPress property using your XD layers.
${code} - Text Only - Allows for raw PHP in layers, including native WordPress Functions.${thumbnail} - Shapes Only - Renders the post/page thumbnail using the size of the layer.${link:<?php the_permalink(); ?>} - Layers Only - Add a web link to the post/page url.⛔ IMPORTANT: You must use ${fix} to clear your loop and add padding to content.Dynamic Sidebar
Because we define the size of our archive results, we can use the remaining space to display our WordPress sidebar. This will automatically create the required div columns based on your XD design.
${get_sidebar} - Shape Only - Calls the native WordPress sidebar. Step 6: Search.php
search - Artboard onlyThis folder will render the WordPress search.php file based on your XD design. The search.php file acts as the base page for WordPress search results, before the archive.php file.
The search.php file has a minimal structure as WordPress only recommends some properties that you should include in your XD theme design.
Example Search Design
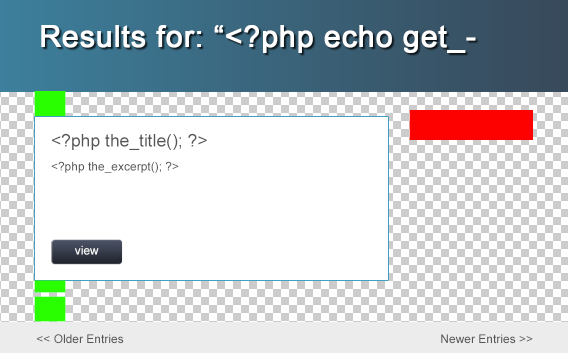
✱ NOTE: This example uses the ${div|posts} tag to enable a Custom Loop.✱ NOTE: WordPress recommends you: (a) Display thesearch title, with thesearch term(b) Display alist of posts/pages(c) Show navigation links tonext and previousposts
✱ NOTE: Optional:
(d) Include the search form again
Search Title

Due to the dynamic nature of the Searches, WordPress recommends you strucutre your title to display the search term which generated the results.
Example Search Title Text Content
1 | Results for: "<?php echo get_search_query(); ?>" |
${code} - Text Only - Allows for raw PHP in layers, including native WordPress Functions.Navigation Links
This will add pagination to the search results.
${next_posts_link} - Text Only - Renders a link to the next Post/Page ${previous_posts_link} - Text Only - Renders a link to the previous Post/Page The Search Loop
When using Custom Loops you will need to add each post/page property individually in your XD file. Export Kit will use your XD layout to generate the correct WordPress loop objects, and render the WordPress property using your XD layers.
${code} - Text Only - Allows for raw PHP in layers, including native WordPress Functions.${link:<?php the_permalink(); ?>} - Layers Only - Add a web link to the post/page url.⛔ IMPORTANT: You must use ${fix} to clear your loop and add padding to content.Dynamic Sidebar
Because we define the size of our search results, we can use the remaining space to display our WordPress sidebar.
${get_sidebar} - Shape Only - Calls the native WordPress sidebar. Search Form
${get_search_form} - Shape Only - Renders the default WordPress search formStep 7: 404.php
404 - Artboard onlyThis folder will render the WordPress 404.php file based on your XD design. The 404.php file acts as the default page for queries that return no results.
☕ EXAMPLE: A page not found.The 404.php file has a minimal structure as WordPress only recommends some properties that you should include in your XD theme design.
Example 404 Design
Your 404 page does not use the WordPress loop, and should mostly be a static page with minimal WordPress modules.
⛔ IMPORTANT: You must use ${fix} to add padding to content.✱ NOTE: WordPress recommends you: (a) Display auseful error messageto the user (b) Include thesearch formagain
Error Title and Message
This should be a static text layer as no content is rendered from the database.
Search Form
${get_search_form} - Empty Layer - Renders the default WordPress search formStep 8: Styles.css
Export Kit will convert your XD to CSS inlcuding all your XD layers and effects. Along with custom CSS in your XD design, you will need to inlcude the default WordPress styles also.
⛔ IMPORTANT:styles.cssisauto generatedby Export Kit,DO NOTedit this file in the output, usecustom.cssinstead.
⛔ IMPORTANT: YouMUSTinclude the default WordPress styles or WordPress will render with thedefault browser CSS.
Default WordPress Styles
⛔ IMPORTANT: WordPress Ouptut uses .ek_theme as the top-level CSS parent.entry-title widget-title ek_theme>>p ek_theme>>blockquote p ek_theme>>cite comments>>h3 ek_theme>>li ek_theme>>.wp-caption-text ek_theme>>.wp-caption-text a ek_theme>>.wp-caption-text a:hover ek_theme>>dt ek_theme>>dd ek_theme>>a ek_theme>>a:hover ek_theme>>td ek_theme>>thek_theme>>table ek_theme>>th ek_theme>>td ek_theme>>pre✱ NOTE: This may use menu-item or nav-item depending on your WordPress design. nav-item>>a nav-item>>a:hover
Custom WordPress Styles
We recommend you add as many CSS Styles as possible to get the maximum usage of WordPress and its CSS3 support.
✱ NOTE: You should reuse images as much as possible to save the end-user on bandwidth.✱ NOTE: Create custom styles the end-user can reuse in new posts/pages.Step 9: Functions.php
Export Kit will convert your XD to WordPress theme with all functionality included. Your functions.php file will contain your custom navigation elements, your base views and admin options.
⛔ IMPORTANT:functions.phpisauto generatedby Export Kit,DO NOTedit this file in the output, usecustom.phpinstead.
Step 10: Admin Options
A premium WordPress template should allow you to modify static content to customize your theme.
text content, colors, links and images.Export Kit works hand-in-hand with the WordPress admin area. You can customize any layer in your XD design and then edit the property in the WordPress admin, wihtout re-exporting the XD. This makes it great for the end-user to personalize your WordPress theme to their requirements.
${wp_opt|[OPTION ID]:[OPTION NAME]} - Layers Onlyusage: ${wp_opt|home_logo:Logo}⛔ IMPORTANT: You must use aunique [OPTION ID]when creating WP options, otherwise WordPress will assume you want thesame property for different layers!
Adding Options
Export Kit will output you admin options based on your XD setup. Export Kit will first look for the current WordPress page and create an admin tab for each page containing options. Then options are grouped into their parent folders in the admin menu.
✱ NOTE: Add as many options as possible,the more the better. These are optionsthe end-user will thank youfor allowing them to edit!
Text Options

Text options will allow you to edit the text content.
Image Options

Image options will allow you to edit the image url.
✱ NOTE: Image urls arerelativeto thetheme skins folder.
Shape Options

Shape options will allow you to edit the shape color.
Step 11: Custom Templates
Custom templates give the end-user more flexibility in creating custom post, pages, categories, tags and more on their WordPress website.
Custom Template Design
Assume you are creating a custom services template for posts/pages.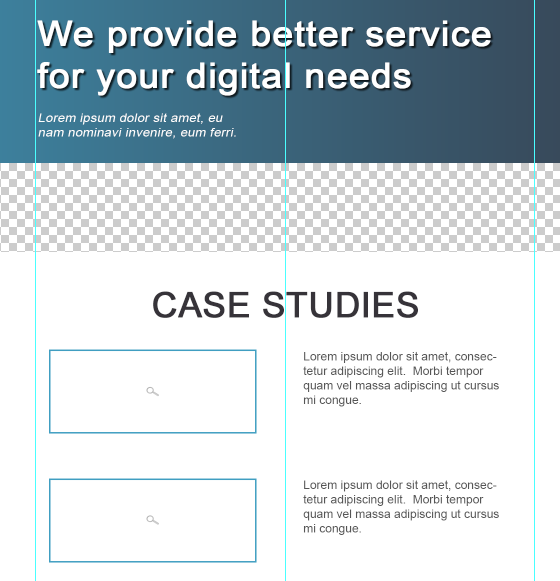
Follow the previous steps in this guide to create your custom template design. You are not limited to your design for custom pages, unless you are creating a Type Specific Template (eg. categories and tags, or a post design for a specific category).
✱ NOTE: You should use conditional loops with your design to ensure the template is flexible.
✱ NOTE: Add admin options to your template design to give the end-user additional customization options.Page Templates
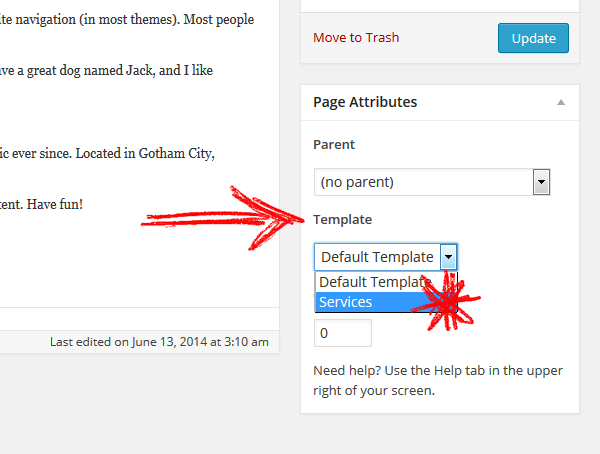
✱ NOTE: If your template isnon type-specific, then the template will become visible in the page templates - in theAttributesoptions group.
Type Specific Templates
front-page - Creates a theme template for the latest posts or blog home page.home - Creates a theme template for the blog home page.single-feature - Creates a theme template for post where the post_type is a "feature".page-news - Creates a theme template for pages with the page slug "news".image - Creates a theme template for image attachments.Step 12: Screenshot.png
You can create any custom screenshot for your WordPress theme using Smart Resize with Images Panel.
✱ NOTE: To create a custom screenshot.png:
1. Add the image you want as your screenshot.png in an Artboard
2. Open Images Panel, select "WordPress" from Smart Images
3. Click "Icons"
Step 13: Responsive Themes
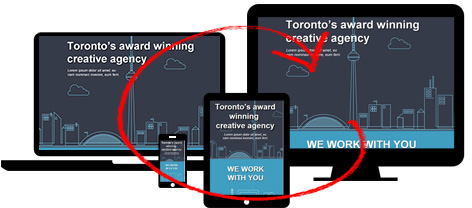
Responsive WordPress themes are not just common, they are almost required by all end-users. Responsive WordPress themes are simple to create with Export Kit, but depending on your XD design – this can take some time to complete.
✱ NOTE: Creating a responsive design for WordPress themes can be a lengthy process as WordPress XD designs will tend to have many layers!Step 14: Before You Export
✱ NOTE: You're almost there - a pixel perfect responsive WordPress Theme - in a few minutes!Align Your Look And Feel
You can use Align Output and Hide Overflow to customize your look and feel with Flush and Fluid layouts.
Fluid layouts.Step 15: Test Your Theme
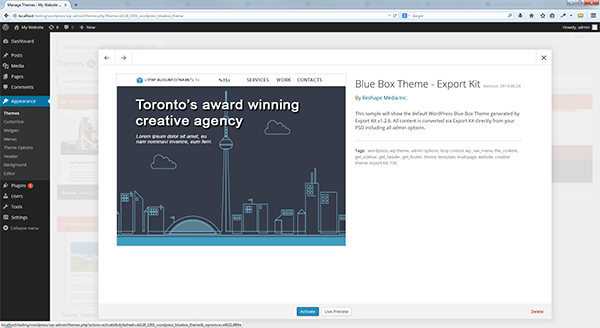
Export Kit will convert your full XD to a WordPress Theme, ready to import. You will need to copy your custom WordPress theme to your wp-theme folder and enable the theme from the Apperance menu in your WP admin.
Your Export Kit Admin
Export Kit will create a custom Admin area based on your XD design. The Export Kit admin will have the global theme settings, along with custom WordPress options (a tab per page) assigned in the XD file.
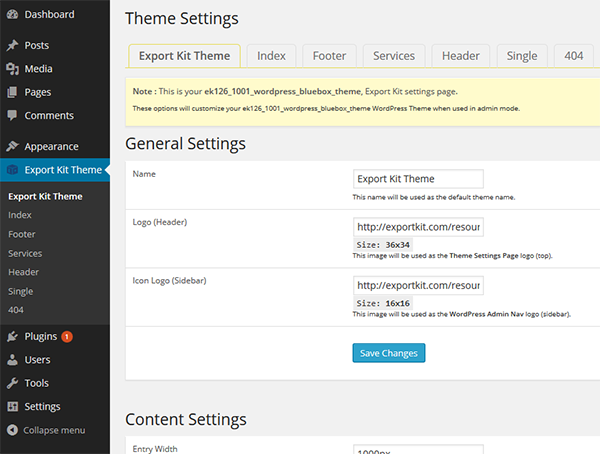
Use these options to personalize the WordPress theme admin and webiste content rendering.
General Settings:Name- This name will be used as the default theme nameLogo- This image will be used as the Theme Settings Page logo (top)Icon Logo- This image will be used as the WordPress Admin Nav logo (sidebar)
Content Settings:Entry Width- The content width for default WordPress loopsEntry Container Margin- The content container padding
Theme Settings (Tabs):
Depending on your XD design, your WordPress admin may have many tabs and options enabled - try them!
Theme Unit Test
All WordPress themes generated by Export Kit will pass the official WordPress Theme Unit Test, as all production themes should. When packaging a theme for an end-user you should make sure your theme can handle the Theme Unit test cases to ensure the end-user does not encounter display errors.
✱ NOTE: Setup a test environment for WordPress and import (Tools > Import) the Theme Unit Data.