
Convert a PSD to CSS

Export Kit takes PSD to CSS and CSS3 to another level with advanced Photoshop layer support to convert your PSD to CSS in minutes. You can convert both natural Photoshop designs to CSS or use our exclusive PSD to CSS Styles and Themes engine for total control when creating CSS style sheets from your Photoshop PSD.
You can use any PSD to convert your design to CSS. Export Kit supports both legacy IE6 and current CSS3 effects based on your Photoshop layer styles. Each style in your PSD will convert to individual CSS mappings based on the layer type, with all CSS effects included.
NOTE: There are many things to consider with PSD to CSS conversions as Photoshop and CSS do not render effects the same - learn more.
IMPORTANT: This tutorial covers a CSS only export, if you want to create a website the try our PSD to HTML tutorial.
Before You Begin
CSS has very specific rendering rules which you must follow when designing a PSD for CSS conversion. Your PSD layer names and ordering are key to correctly rendering valid CSS without visual errors. You should plan ahead if you are creating styles for a current Export Kit project, or classes for an external project.
Use Unique Names
 The most important is your PSD layer order when converting your CSS styles. CSS will override any previously defined style – this means that if you do not use
 UNIQUE layer names, you may override a previous PSD layer in your CSS.
Photoshop vs HTML/CSS
Photoshop and HTML/CSS are not the same. Photoshop is a single-emulated environment – meaning you can only use Photoshop to view/use Photoshop. Where HTML is a multi-emulated environment – meaning any browser and device can render HTML any way it likes.
IMPORTANT: Photoshop can design anything, to ensure your design is converted as-is all elements areabsolutepositioned insiderelativecontainers.
Export Kit Default CSS
Export Kit uses specific CSS content to allow your PSD design to convert pixel-perfect. In most situations, a current website will not use the same base CSS settings, and will likely have a custom CSS framework.
Example Export Kit Base CSS
1 2 3 | body { margin: 0px; padding: 0px; font-family:"Arial"; overflow-x:hidden; } img { position: absolute; display: block; margin: 0px; border: none; padding: 0px; } div { position: absolute; } |
Step 1: Working With Layers
Each Photoshop layer is processed differently with Export Kit to correctly render your PSD to valid and clean CSS. You PSD layer will convert with all available styles and effects based on your document settings. Each effect will process with support for all major browsers including IE.
Basic Layer Data
The basic layer data will include (a) name, (b) position, (c) size, and (d) opacity. All layers will include this default data.
1 2 3 4 5 6 7 | #layer { opacity: 0.7; top: 240px; left: 446px; width: 310px; height: 166px; } |
Hidden Layers
If you enable Hidden Layers, you will also render the visibility state of the PSD layer with the export.
1 2 3 | #layer { display: none; } |
Image Layers
You MUST enable CSS Images, to render the background image of the PSD layer with the export.
1 2 3 | #layer { background:url(../skins/css_output/img.png); } |
Text Layers
PSD text layers will include the text content of the layer along with font information +styles +line-height.
1 2 3 4 5 6 7 8 9 | #layer { font-family: OpenSans, Arial, Helvetica, sans-serif; font-size: 14px; font-weight: bold; text-decoration: underline; font-style: italic; text-align: left; color:#363636; } |
Shape Layers
PSD shape layers will include the shape type of the layer along with border radius, and color.
1 2 3 4 5 6 7 8 | #layer { -ms-border-radius: 20px; -o-border-radius: 20px; -moz-border-radius: 20px; -webkit-border-radius: 20px; border-radius: 20px; background:#FF0000; } |
Step 2: Working With Layer Effects

Layer Effects will enhance your Output with additional rendering features for use with PSD to CSS. You can add effects to any Photoshop layer element and Export Kit will render the effect directly in CSS.
NOTE: CSS3 DOES NOT support all Photoshop layer effects.
IMPORTANT: Depending on your effect and the angle, your element size may change to reflect the effect applied to the element - learn more.
Drop and Inner Shadow
- Shadow Color
- Opacity
- Angle
- Distance
- Choke/Spread
- Size
Outer and Inner Glow
- Glow Color
- Opacity
Color Overlay
- Fill Color
- Opacity
Gradient Overlay
- Gradient Colors
- Opacity
- Angle
- Style
Stroke
- Stroke Color
- Size
- Opacity
Step 3: Multiple CSS Files

Enable Page Tags with your output and you can extend CSS by creating multiple stylesheets in a single PSD file. You can store individual layer styles in a single page, eg. buttons.css or theme.css – containing only the required elements. This allows for a modular approach when creating your PSD to CSS styles.
EXAMPLE: ${page:buttons} button stylesEXAMPLE: ${page:theme} theme stylesStep 4: Responsive Media Queries
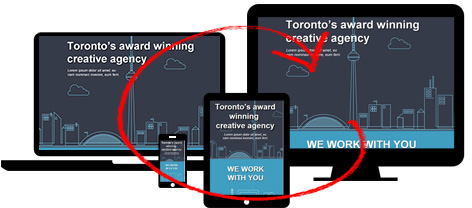
Use CSS Screen Tags to create unlimited media queries for any device size. Use unlimited target screens to personalize your responsive export. CSS will store the position and size of elements individually per target screen to render your design as-is.
Common Responsive Screen Sizes
You can cut and pates any of the following tags and use them as your responsive css folder group name. Each target screen will contain element properties based on the design for that screen.
${css|screen:160} Smartphone All${css|screen:240} Smartphone Portrait${css|screen:321} Smartphone Landscape${css|screen:760} Tablet${css|screen:768} iPad${css|screen:1224} Desktop/Laptop${css|screen:1824} WidescreenStep 5: Custom CSS Styles
CSS classes in your PSD are applied directly to your Photoshop layer elements regardless of the layer type. This allows you to create global PSD to CSS styles that you can apply to any element in your HTML output.
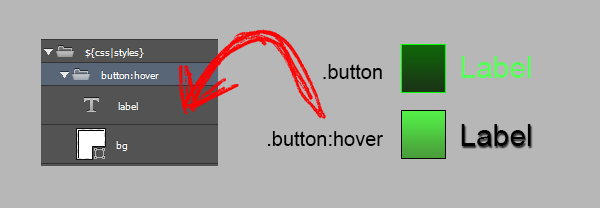
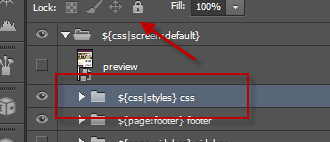
Your ${css|styles} folder will contain all the custom CSS class styles to reuse in your document. All elements added to this folder will render as a CSS class in the output using the element name, styles and effects.
IMPORTANT: You can create very advanced CSS styles with Export Kit but it takes a full understanding of CSS or you can easily override a previous class (similar to real life).Normal Usage
CSS is compiled in order – last in, last out. This means that you MUST add your custom styles at the TOP of your PSD document, otherwise the layer elements will maintain their layer effects/styles without change. This includes responsive designs, keep your CSS Styles at the very top of your layers.
Advanced Usage with Responsive
When using CSS Styles, it will create the styles AT THE POINT you place it in your design. We ask users to place the folder at the “top” of their design to avoid confusion. When you place your CSS Styles inside a screen folder, the next screen will NOT contain the previous styles – this is NOT a mistake. What you did was target the CSS Styles to render ONLY when the target screen is active.
You can further target specific styles to map only to an individual target screen by placing your CSS Styles folder inside the screen. Note that your global styles will likely OVERRIDE your screen styles if they are placed at the “top“.
Learn more about Creating Responsive Target Screens.
Advanced Usage with Pages
Pages are similar to Screens where individual styles can reflect a single page only. Adding a CSS Styles folder to an individual CSS page will render the styles with that page only, but will also render the global styles.
Learn more about Creating Multiple Pages.
Advanced Usage with Themes
You can target individual styles to only render under a parent element, this allows you to create multiple CSS styles for example; a content background, button background and image background in a single PSD file.
1 2 3 | .content > .background{ color:#333333; } .button > .background{ color:#00ff00; } .image > .background{ color:#000000; } |
You can go further by assigning styles to parent classes only for example; backgrounds for content, button and image when inside theme1 can be different when inside theme2 class.
1 2 3 4 5 6 7 | .theme1 > .content > .background{ color:#333333; } .theme1 > .button > .background{ color:#333333; } .theme1 > .image > .background{ color:#333333; } .theme2 > .content > .background{ color:#000000; } .theme2 > .button > .background{ color:#000000; } .theme2 > .image > .background{ color:#000000; } |
