
PSD to Visual Studio XAML UI with .NET and C#
Convert your PSD to Visual Studio XAML UI with .NET and C# support in minutes. The PSD to Visual Studio conversion is simple and painless with full support for Image Asset mapping, XAML Pages and more. PSD to Visual Studio is an advanced export and will require a general understanding of Visual Studio, .NET and C# to modify the code.
Visual Studio XAMLs are unique and support many features and options. You can create virtually any XAML UI, but the power of Visual Studio is in .NET and C#. Export Kit creates all required code files and assets to import your .NET project and begin your Visual Studio app solution - just like that!
IMPORTANT: Visual Studio is ALPHA, additional features to come in future updates.Before You Begin
Visual Studio XAML UI and .NET are advanced exports and will require customizations in the code to make the Visual Studio app functional. Each platform of Visual Studio is slightly different and may require advanced knowledge of .NET to correctly configure specific environment options.
PSD to Visual Studio XAML UI with .NET and C#
This guide will show your custom Visual Studio XAML UI and .NET from your PSD to Visual Studio UI export.
Step 1: Visual Studio UI Design
Visual Studio can target many desktop and mobile devices in your PSD design, but you should have one base design to first create your elements in. You can copy your design to various target screens after you approve your default device design.
EXAMPLE: Windows desktop and mobile can share the same UI elements, but will require different layouts.
Element Rendering
![]()
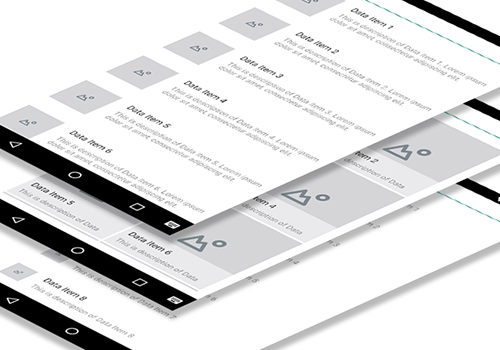
Export Kit will convert your PSD layers to Visual Studio XAML elements with relative positioning to its respective parent element. You designs will render WYSIWYG (What you see is what you get), this means you must target the correct device screen size to get pixel-perfect translation of your PSD to Visual Studio XAML elements for .NET.
NOTE: Your PSD to Visual Studio UI elements will use relative containers with margins to measure the element's position and size.
NOTE: Photoshop and Visual Studio both render elements differently, and have different support for effects. Some Photoshop styles may not render the same visually in Visual Studio - we will fix this in future versions.
Image Rendering

Images are rasterized and rendered as-is. Your image will size according to the target screen and will render in the Assets folder. Images are automatically linked to your solution as component assets.
IMPORTANT: You must MANUALLY include your skins folder with your Visual Studio solution.Shape Rendering

Export Kit will convert Shape Elements from your PSD design directly into native Visual Studio shapes. There are no special settings required for processing shapes, simply use the shape tool and choose your shape, along with your desired shape options; Export Kit will do the rest.
Example Shape Element
1 2 3 4 5 | <Rectangle x:Name="background" Fill="#FFFFFFFF" Margin="-1,-1,0,0" Width="602" Height="602" /> |
Text Rendering

Export Kit has great Text Support for justification for left, center and right; including various character styles and paragraphs. There are no special settings required for processing text, select the text tool, your font and settings; Export Kit will do the rest.
Font Rendering
You will have to manually add your required fonts into your Visual Studio project. In future versions we will import them from you.
Step 2: Working With Layer Effects

You can convert your PSD layer styles to native Visual Studio XAML styles directly with Export Kit. Your styles and effects will convert with all available options to render as a native Visual Studio effect.
NOTE: Not all Photoshop Effects and Styles convert to native Visual Studio XAML styles. Some styles require pure C# to render, and will be available in future updates.
Shape Effects Support
Text Effects Support
Step 3: Frame Pages
You can create an unlimited number of Visual Studio XAML Frame Pages from your PSD design with Export Kit. Each XAML Page will maintain a layout and C# file.
RULE: Your project and page names must start with a letter, and use letters and numbers only.
RULE: You must have content in your main XAML Page.
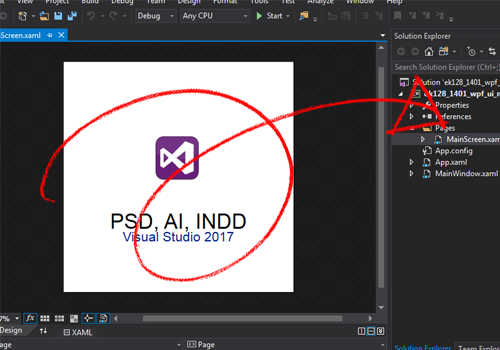
XAML and C#
![]()
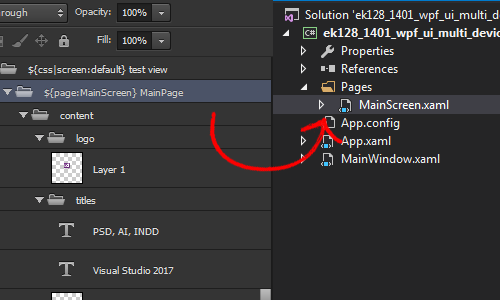
All ${page} folders convert to respective XAML and C# in the PSD to Visual Studio output. Your C# files will reference all the layer elements contained in the Visual Studio XAML layout file with out special imports.
Step 4: Before You Export
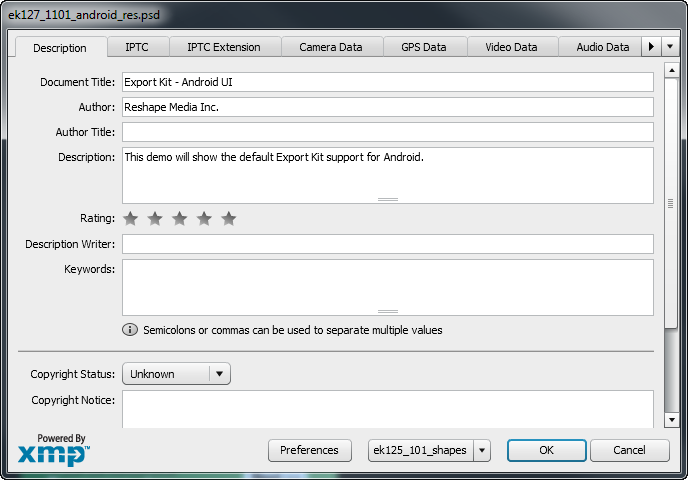
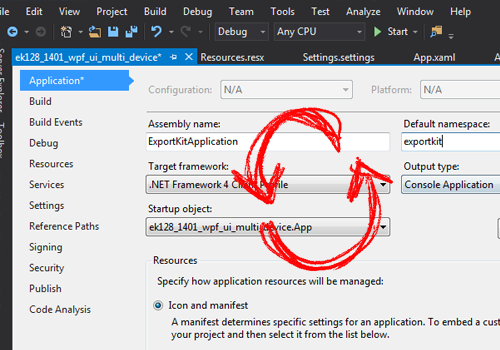
Your PSD document meta is used in your Visual Studio UI output. In future updates we will provide support for additional PSD file info properties.
PressCtrl + Shift + Alt + ito access the Photoshop document meta, or go toFile > File Info.
You're almost there - pixel perfect Visual Studio XAML UI with C# and .NET - in minutes!
Avoid Output Errors
Make sure you read and understand our PSD Design Rules and Layer Naming Rules to avoid visual errors in your Output.
Make sure you read and go over our Before You Export Check List to avoid functional errors in your Output.
BUG: Element does not support direct content
FIX: Re-add UIAutomationProvider to your References.
Export Kit Settings
Export Kit allows you to customize your Output with Layer Options and Output Options before you export to personalize your project.
NOTE: Visual Studio works out-of-the-box.
Average Export Times
4 - 6 min= Single Scene App8 - 12 min= Multi-Scene App (4 Pages)14 - 20 min= Multi-Device/Scene App (3 devices)
If The Export Stops – You Stop!
Export Kit will cancel an Output if it finds an error in the Photoshop layer. If Export Kit cancels / stops the Output, what you should do is:
- Note the layer the Output canceled on
- This is the layer
causing the issue, read: No Empty Layers - This is only for you to
note the layer, anddebug the problem DO NOTsave the document,CLOSEthe document andREOPENit- Fix the problem,
SAVEand re-export it
Step 5: Import Your .NET Project
Export Kit will provide you with a full .NET-ready Visual Studio project to import. You will need to have the required Visual Studio .NET IDE to both modify and compile the output files.
Quick Import Steps:
- Open .NET, press
File > Open - Navigate to your Visual Studio output folder
- Open the
.csproj project file
Preview with XAML Layout
All PSD to Visual Studio XAML UI outputs are rendered as-is for preview in the Visual Studio XAML Design viewer. You will see right-away you PSD conversion to pure Visual Studio XAML elements with most layer properties intact.
You can edit properties and elements using either Visual Studio XAML Design viewer or your C#. Each Page in your XAML will give you access to the respective elements from your design.
NOTE: Photoshop and Visual Studio both render elements differently, and have different support for effects. Some Photoshop styles may not render the same visually in Visual Studio - we will fix this in future versions.
Step 6: Now Build Your Super App
At this point your PSD to Visual Studio XAML UI is ready to compile and test. All your assets, class elements and layouts are ready to go. That’s easily weeks to months worth of work, ask your self: “Self, is there another way to convert PSD to Visual Studio?“
ALPHA RELEASE: Please report all bugs and errors, or send us any feature request - click here.
