
Create a Full Screen Background
Step-By-Step Video
Need a visual? Watch our step-by-step tutorial!
Consider The User Screen Size
Before you create a full screen background, you have to consider the size of your PSD Document vs. the size of the user screen.
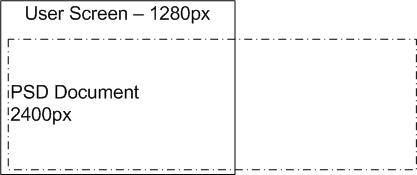
NOTE: If your Document is larger than the user screen, you will likely have unexpected results in your Output.
You can create full screen backgrounds with Export Kit in a few simple steps.
Full Screen Background Concept
You need to have a default Document size for your design. Your document should show WYSIWYG (What You See Is What You Get) – your background can change via Output Options with Export Kit Pro.
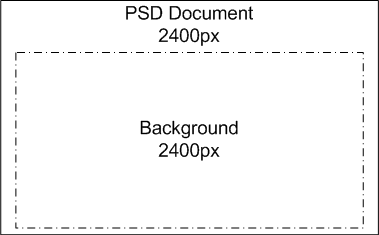
Many PSD designs will include the background in the design itself. This will change the PSD Document size in the Output, causing unexpected results.
NOTE: Your Document size = your Output size.
Step 1: Resize The PSD
Change the image size of the PSD design to match your content width. Your PSD design at this point should reflect WYSIWYG (What You See Is What You Get).
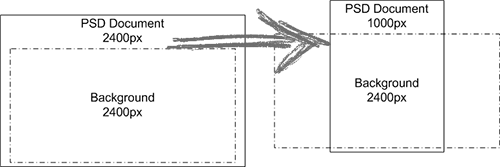
The concept is to have your PSD Document size MATCH the size of your content, and have the background span ouside the document.
NOTE: If your content width is 1000px, the Doucment width should be 1000px.
Step 2: Resize The Background
Once you have your desired width, extend the size of the background elements to a very wide size, eg. 2400px (something wider than most desktop screens).
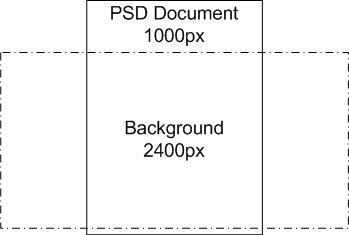
NOTE: Your Background should be larger than the Document.
Step 3: Align and Overflow
You can now customize the look and feel of you Output before you begin your export.
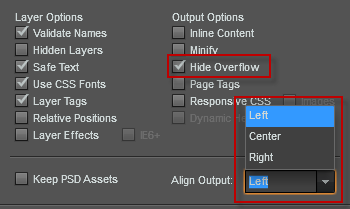
Read more about how to use Align Output and Hide Overflow with your Output.
