
Create a PSD to PHP Email Form Handler
Use Export Kit to create XD, PSD, AI and INDD to PHP Email Form Handlers and other modules in a few clicks. Export Kit makes it easy to build data-driven websites in a matter of minutes with full support custom code scripts and frameworks.
✱ NOTE: This tutorial assumes you have knowledge of PHP Coding - otherwise Google "Free PHP Form Handler".
Step-By-Step Video
Need a visual? Watch our step-by-step tutorial!
Step 1: Create the Form Pages
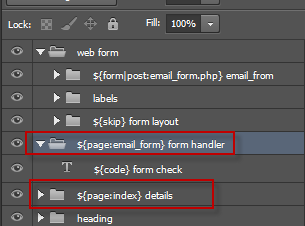
Create your individual pages required to render the form using our ${page} tag. These pages may change from project-to-project, but at minimum we recommend you create an index page, and a page to process the script – in the example email_form.
There are no limitations on page designs, your form handler will render where you tell it render!
Step 2: Link the Form and Script
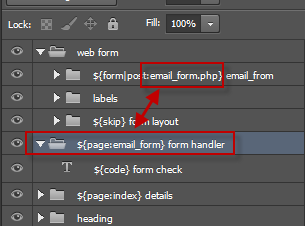
Ensure your form link and your page name are the same to send the form data to the correct page. Once the form link and script page match, all layers marked as ${input} will send data to the script page.
✱ NOTE: You can always link to an external file, but this tutorial shows how to do this directly inside your XD, PSD, AI and INDD.Step 3: Create Your Code Layer
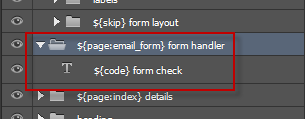
Using Code Tag with your layers will allow you to add raw scripting elements such as HTML, CSS, JS or PHP directly inside your text layers.
Layer Size and Position
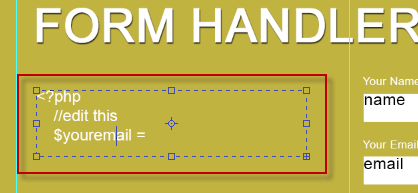
Your layer placement is very important as all elements rendered via code will likely render inside the area of the layer. This means that you must draw your text layer to match the size you expect your rendered content.
 EXAMPLE: If you are creating a label for a name, and you expect long names - then draw the text layer to the max size you expect.
Code Script
1 2 3 4 5 6 7 8 9 10 11 12 13 14 15 16 17 18 19 20 21 22 | <?php //edit this $youremail = "youremail@yoursite".".com"; $subject="Message sent using your contact form"; //DO NOT edit this $name=$_REQUEST['contact_name']; $email=$_REQUEST['contact_email']; $message=$_REQUEST['contact_message']; $output = "Email sent, thank you!"; //error check if(strlen($message) < 10){ $output = "<span style=\"color:#ff0000;font-weight:bold;\">ERROR:</span> " ."Message too short."; }else{ $from="From: $name<$email>\r\nReturn-path: $email"; @mail($youremail, $subject, $message, $from); } echo $output; ?> |
You can copy-and-paste this script directly into your PSD file for an out-of-the-box solution. This script will perform a basic error check of the email message and notify the user of an error if the message is less than 10 characters.
TIP:
DO NOTedit your code script inside XD, PSD, AI and INDD - it is not a text editor. Edit it outside of your design then cut-and-paste.
Step 4: Export Settings
When creating dynamic pages, you must Enable Page Tags in your options to render each individual page.
 Start saving time and money!