
Responsive HTML Email Designs

Responsive HTML Email template designs are used by virtually all websites to send email notices, newsletters and more. Most common email clients can handle Responsive HTML parsing, the use of standard text-only emails is typically only as a fallback or for legacy support.
Export Kit makes email designs quick and simple with a few easy steps to follow. Email designs are NOT website designs and follow very different rules. A typical email design should not have “too many” elements or “too much” content – its an email, not a blog post!
IMPORTANT: Emails must use
a lot of Foldersto correctly render. Your layer order isVERYimportant, as legacy email clients will only render in a specific order.
Email Design Crash Course
Unlike web browsers, email clients do not parse all HTML elements. This is mainly for security reasons, but also to preserve bandwidth. When you design your email template, you have consider a few things to ensure your output is 100% what you expect.
KISS – Keep it Simple, its an Email.
An email should contain only a few images at most. DO NOT flood your design with many images, as your user may connect their email client on a slow machine – this can cause longer than normal download times for your email.
You Must use Tables to Maintain Your Design
Tables are key to visually maintaining your design elements. Emails are considered the Wild West when it comes to rendering as there are MANY email clients and each renders differently.
GMail vs. Microsoft Outlook, and may require special code to correctly render on all clients.
✱ NOTE: Microsoft and Opera are 2 that require special code.Emails Do Not Support <div/> Element
Emails have very limited rendering capabilities and only allow a few elements – <div/> is not one! Many elements in Export Kit convert to a <div/> naturally so you may need to use Code Tag for specific rendering.
✱ NOTE: Using a Div will not break your email, but your elements will not render as expected.Emails Do Not Support CSS3
You should ONLY use simple styles aka a solid color with Tables. Email clients DO NOT support complex CSS3 effects, and will not render these with your email.
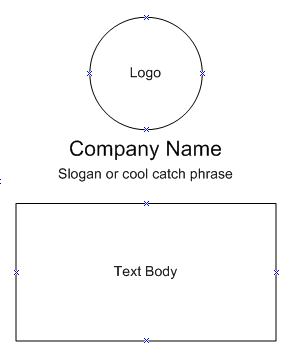
Your Email Elements
Email clients are not the same as a web-browser, they have very different rules – a main one is you must treat your design like a table and create “horizontal content blocks” aka Table Rows.
✱ NOTE: Unlike a website which can have many element types and many images in various locations, an email should be simple and fast loading.Tables
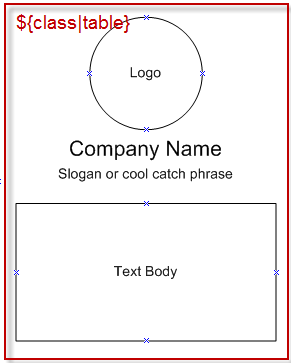
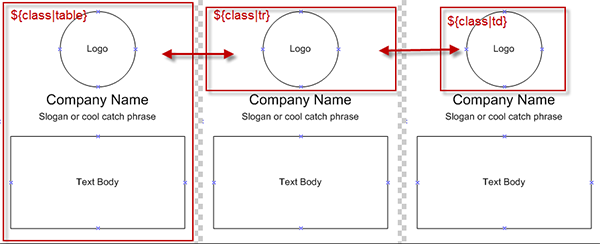
(FOLDERS ONLY)
1 | ${class|table:width="100%" border="0" cellpadding="0" cellspacing="0"} |
This will create a table without borders and padding which will allow you to ”design normally” – to an extent. You can additionally add External CSS to control these elements.
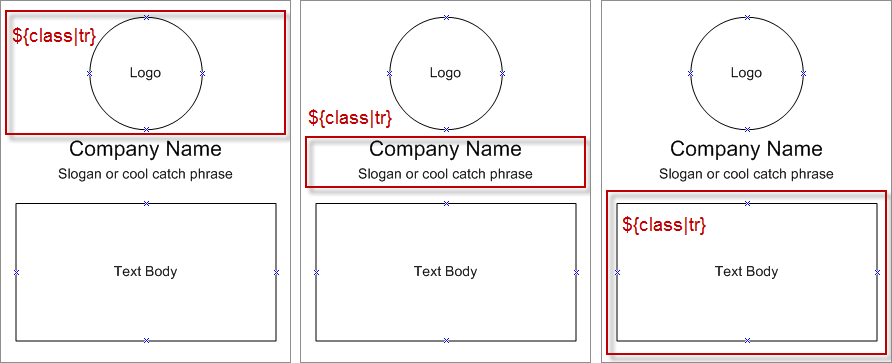
Rows (tr)
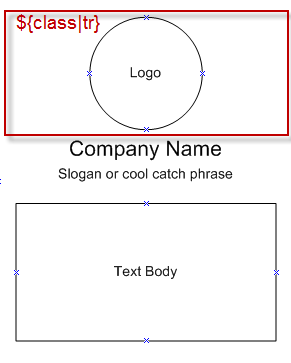
(FOLDERS ONLY)
1 | ${class|tr: } |
It is IMPORTANT to note the colon/space “: ” in the Class Tag. Class Tag requires args to render correctly, so you must add an argument to the tag – in this case an empty space.
IMPORTANT: This was a previous requirement with Class Tag that we plan to change to allow for classes without arguments.Data/Column (td)
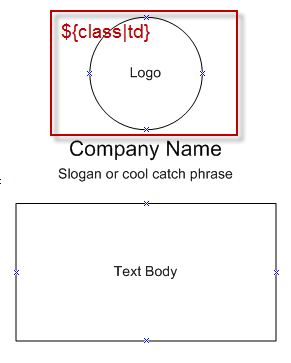
(FOLDERS ONLY)
1 | ${class|td:align="center" class="header"} |
This will create table data that has a center align and uses the class header.
Inner Tables
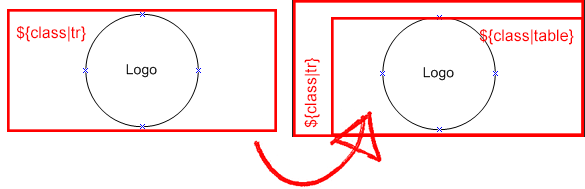
Tables work differently in some email clients and will not always allow you to resize an individual Table Data (td) cell, a commonly used solution is to create a table inside a table. This will reset the layout properties for your inner table, allowing to reposition items without breaking the overall design flow.
Margin Content
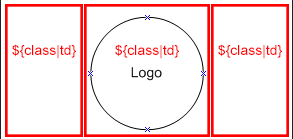
Because some email clients have out-dated HTML support, you may encounter situations where you will need to create margins to correctly layout elements. You can do this with blank images to fill Table Data (td) cells.
✱ NOTE: With some email clients, using CSS properties such astopandleftto position elements are not allowed.
Table Contents
You can naturally add images and they will maintain their properties, but for text, you may want to use Code Tag with your layer to add RAW HTML/Text.
Images
Emails should always use Absolute links (general rule), if you use the raw output – the links are relative. You will need to add your website path to the image src in your output, otherwise your images will not display.
✱ NOTE: If you are testing locally, you will need a localhost.
TIP: Use a text editor to
Search and Replaceyour image src path.
EXAMPLE: Search:src="../skins/Replace:src="//yourwebsite.com/path/skins/
Text
By default Export Kit will render your Text Layers as a Div, you may want to use Code Tag for RAW HTML/Text.
✱ NOTE:DO NOTadd yourEMAIL BODY/CONTENTto your design!
Your design is likely a template which will generate your email content from a server – you will normally add your email content AFTER your export. You should not have your email content in your design.
Special Characters/Languages
Email clients do not support JavaScript, our Char Tag (characters and languages) uses JavaScript to encode your text – because you are using email there are a few tricks to workaround this.
ASCIIvalue for your text contents: https://www.google.ca/#q=ascii+to+utf8+converter.
design only" text to Smart Objects or use ${img} tag, eg. logo text.
Responsive Emails
You can add normal Responsive Screens, but emails have slightly different rendering rules. Because you are using Tables, you only need to add responsive design elements for typically tr, td, and contents – not the actual table itself.
Inline CSS Styles
Not all email clients support external CSS files. To work around this, you can Add the CSS Inline or enable Inline Content with your email template.
 Start saving time and money!