
CSS Styles Tag
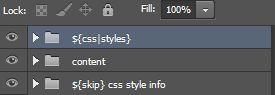
${css|styles}- usage : ${css|styles}
This tag will group all your custom CSS classes created with your PSD elements. All child layers and folders are converted to CSS classes in the output using our Layer Naming Rules.
IMPORTANT: CSS Styles require Relative Positions to be enabled in your output.
You can create very advanced CSS styles with Export Kit but it takes a full understanding of CSS or you can easily override a previous class (similar to real life).Folders only.Normal Usage
CSS is compiled in order – last in, last out. This means that you MUST add your custom styles at the TOP of your PSD document, otherwise the layer elements will maintain their layer effects/styles without change. This includes responsive designs, keep your CSS Styles at the very top of your layers.
Advanced Usage with Responsive
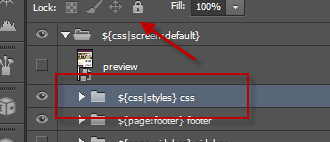
When using CSS Styles, it will create the styles AT THE POINT you place it in your design. We ask users to place the folder at the “top” of their design to avoid confusion. When you place your CSS Styles inside a screen folder, the next screen will NOT contain the previous styles – this is NOT a mistake. What you did was target the CSS Styles to render ONLY when the target screen is active.
You can further target specific styles to map only to an indivual target screen by placing your CSS Styles folder inside the screen. Note that your global styles will likely OVERRIDE your screen styles if they are placed at the “top“.
Learn more about Creating Responsive Target Screens.
Advanced Usage with Pages
This works with CSS Output only.
Pages are similar to Screens where individual styles can reflect a single page only. Adding a CSS Styles folder to an individual CSS page will render the styles with that page only, but will also render the global styles.
Learn more about Creating Multiple Pages.
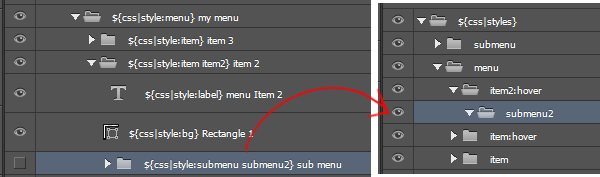
Parent-Child Relationship

Be aware of your parent-child nesting with the ${css|style} layers and folders as classes will maintain this structure. All layers and folders can be personalized to respond only to its parent style.
Define Your Styles
In order to define your CSS styles in Export Kit, you only need to change the layer name of each element in your ${css|styles} folder. These names will reflect true CSS3 support.
Eg. my_styleEg. buttonEg. containername of each layer element will become the CSS style name in the output.Pseudo Selectors
Create pseudo selectors to the full extent of CSS3. You only need to change the layer names to reflect your desired output.
Eg. my_style:hoverEg. my_style:first-childDirect Selectors
You can add direct selectors to each layer in styles folder to native HTML elements. You will have to use ">>" (without space) when adding selectors.
anchor target: my_style>>aspan target: my_style>>spanAdvanced Selectors
You can use any valid CSS3 selector with Export Kit to define your custom classes.
anchor target: my_style>>a[href$=".pdf"]span target: my_style>>input[type="submit"]span target: my_style>>div+pMix and Match Selectors
You can mix and match both pseudo and selectors with your layer names to create fully customized CSS classes.
Eg. my_style>>a:nth-child(2)Only Styles and Effects Matter
When you create your custom CSS classes, don’t worry about the size, position or content of the layer. Only the styles and effeccts will convert in your output.
Hidden Layer Support
CSS styles also support Hidden Layers which will allow you make layers visible/hidden only when required or triggered by the user. Hidden layers can be used to create dropdown menus, steppers, and more – only limit is your imagination!
