Create your first Adobe XD CC Plugin

✱ NOTE: Currently available to Adobe Partners only.Convert your PSD or AI to Adobe XD CC Plugins with full HTML, CSS and JavaScript support in minutes. The PSD and AI to XD Plugin conversion is quick and easy with integrated features to support for Element mapping, Screen Pages and more.
PSD and AI to Adobe XD Plugins is an advanced export and requires a general understanding of JavaScript to modify the code.
IMPORTANT: XD Plugins is
ALPHA, additional features to come in future updates.
 IMPORTANT: XD Plugins are advanced exports and require customizations in the code to make the XD Plugin fully functional.
PSD / AI to Adobe XD Plugins Video Preview
Create Adobe XD Plugins with your PSD or AI file using Export Kit. Render a full XD Plugin from Photoshop or Illustrator with all elements, layouts and assets.
Step 1: Create Your Design
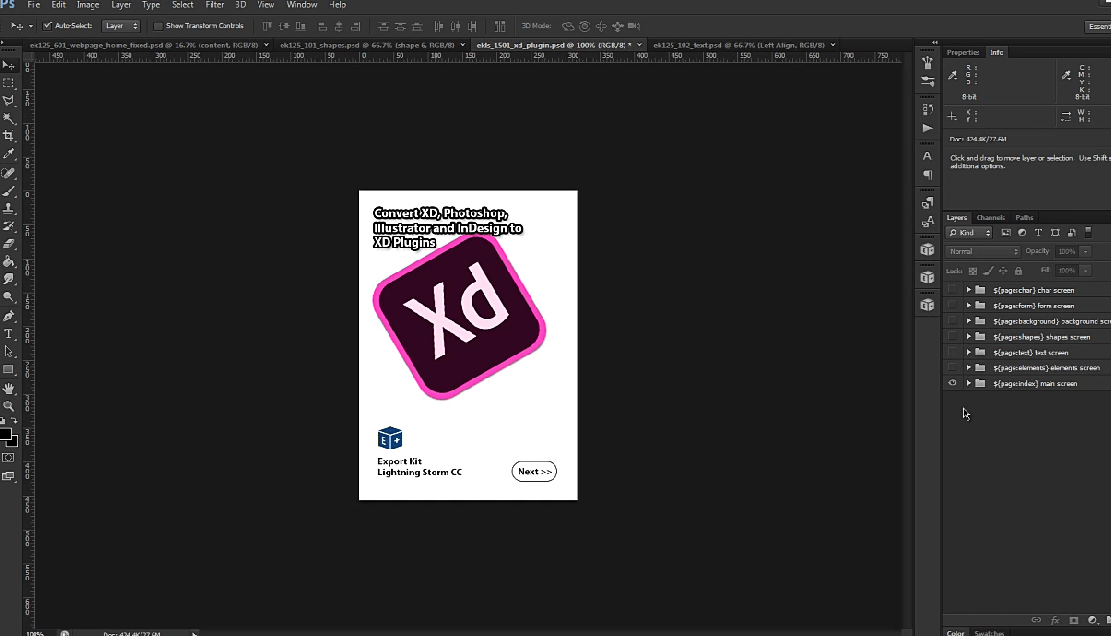
You can create any design to use as your XD Plugin UI with full support for all layer types and effects. All layers and folders are processed following our Design Rules. The more layers and folders, the better the export.
TIP: A quick workaround to correct missing features is to use ${img} tag with the layer until the feature is supported, then re-export without the tag later.
Element Rendering
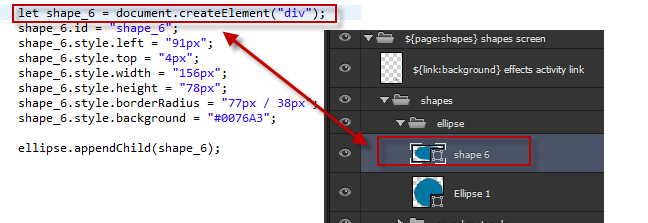
Export Kit will convert your PSD and AI layers to pure JavaScript elements with relative positioning to its respective parent in your XD Plugin. You designs will render WYSIWYG (What you see is what you get), this means you must target the correct device screen size to get pixel-perfect translation of your PSD and AI to Adobe XD Plugins.
✱ NOTE: XD Plugins do not currently support all HTML5 and CSS3 features. Refer to the XD Plugin Documentation for more details. Image Rendering
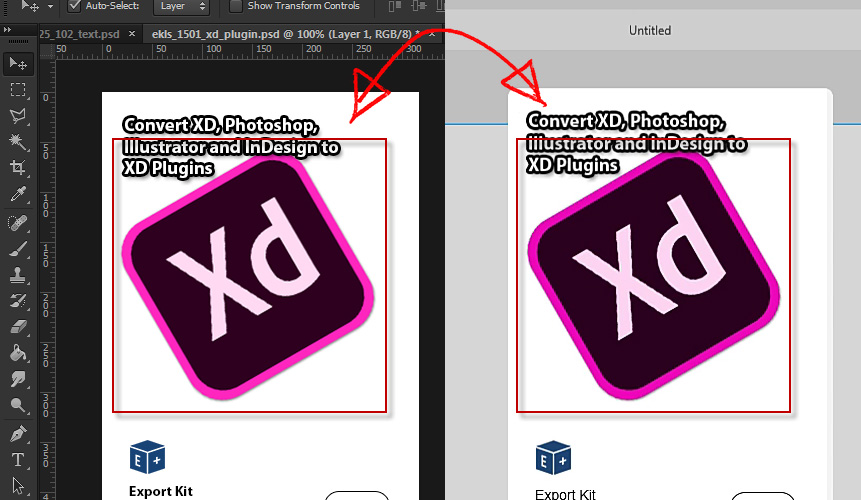
Images are rasterized and rendered as-is in the skins folder. There are no special requirements to process images, export resolutions are based on your PSD or AI settings.
Example Image Element
let layer_1 = document.createElement("img"); layer_1.id = "layer_1"; layer_1.style.left = "-6px"; layer_1.style.top = "31px"; layer_1.style.width = "302px"; layer_1.style.height = "305px"; layer_1.src = "/skins/layer_1.png"; |
 IMPORTANT: All XD Plugins are self-contained and will link the skins folder locally.
Shape Rendering
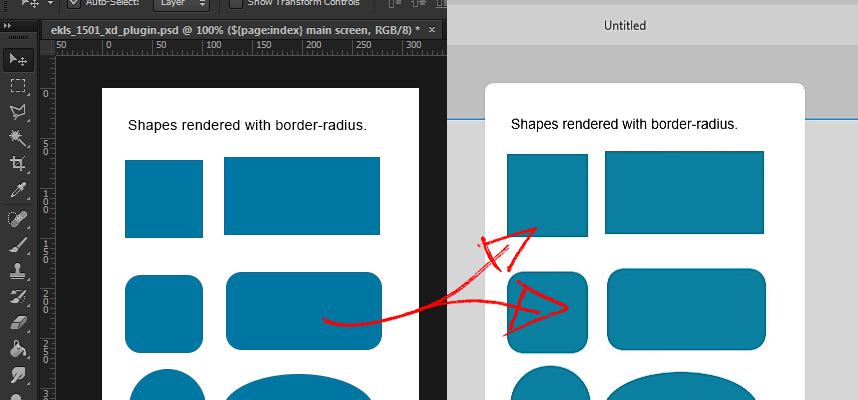
Export Kit will convert Shape Elements from your design to native JavaScript elements within your XD Plugin. Shapes do not require any special settings for processing, easily use the shape tool along with your required options; Export Kit will do the rest.
Example Shape Element
let ellipse_1 = document.createElement("div"); ellipse_1.id = "ellipse_1"; ellipse_1.style.left = "-2px"; ellipse_1.style.top = "-2px"; ellipse_1.style.width = "81px"; ellipse_1.style.height = "81px"; ellipse_1.style.borderRadius = "39px / 39px"; ellipse_1.style.background = "#0076A3"; |
Text Rendering
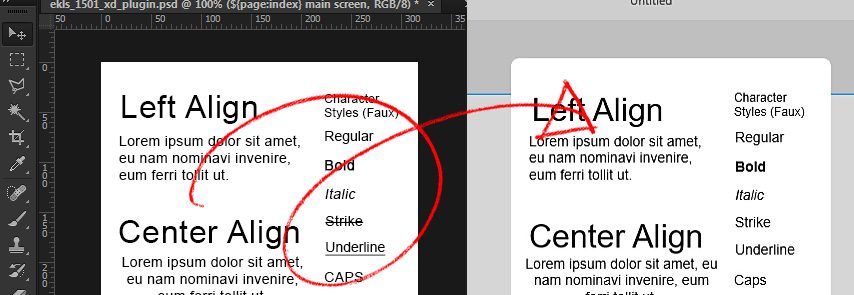
Export Kit has great Text Support for justification for left, center and right; including various character styles and paragraphs. There are no special requirements for text processing: select the text tool, font, and settings = done!
Example Text Element
let ek_lightning_storm_3 = document.createElement("div"); ek_lightning_storm_3.innerHTML = "Export Kit<br/>Lightning Storm CC"; ek_lightning_storm_3.style.textAlign = "left"; ek_lightning_storm_3.id = "ek_lightning_storm_3"; ek_lightning_storm_3.style.left = "27px"; ek_lightning_storm_3.style.top = "393px"; ek_lightning_storm_3.style.width = "130px"; ek_lightning_storm_3.style.height = "37px"; ek_lightning_storm_3.style.fontFamily = "MyriadPro-Bold, Arial, Helvetica, sans-serif"; ek_lightning_storm_3.style.fontSize = "14px"; ek_lightning_storm_3.style.overflow = "hidden"; ek_lightning_storm_3.style.color = "#000000"; |
 IMPORTANT: XD does not currently support "Underline", "Srike" or "Caps" - these will come in a future release.
 TIP: Use ${img} tag, until these features are supported.
Font Rendering
XD does not currently support custom/web fonts.
TIP: Use ${img} tag with text layers that use custom fonts.
Layer Effects
XD does not currently support CSS3 effects.
✱ NOTE: "Stroke Effect" is available with shapes only. TIP: Use ${img} tag with text layers that use custom effects.
Step 2: Name and Organize your Layers
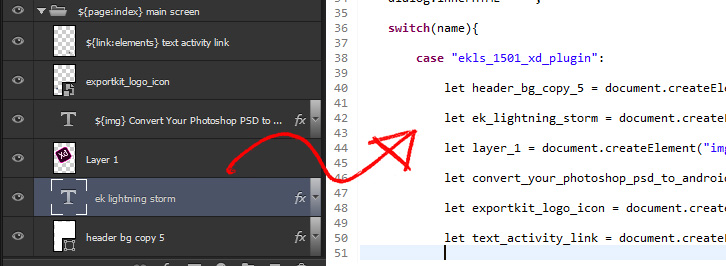
Your layer names will be reflective in your Output. Because Export Kit will render WYSIWYG, you will need clear layer names to further customize your JavaScript after the export. The export process will convert layers regardless of their names, but having clear layer names will optimize the time it takes you to find your layer in your code.
Use Valid Names

You should always use valid and common layer names with your content to ensure readable output. When you use incorrect layer names, most environments will throw errors as not all naming conventions are valid.
 IMPORTANT: JavaScript elements must start with a letter "a-z and A-Z" or underscore "_".
 Use Unique Names

All code environments require elements with unique names for correct rendering. Export Kit will do its best to add a unique identifier to each element (if the element name was previously used), but this is not 100% guaranteed.
Organize Folders and Layers
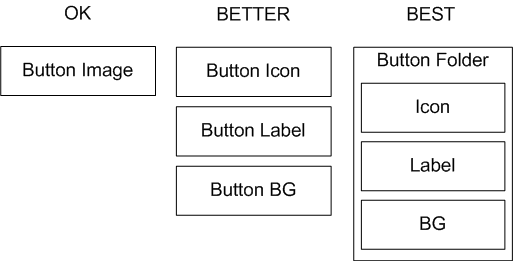
We encourage you to use as many layers and folders to design your PSD or AI as possible. The more layers the better! You should always group your layers into folders if they are related.
Step 3: Use ${link} and ${page} Tags for Navigation
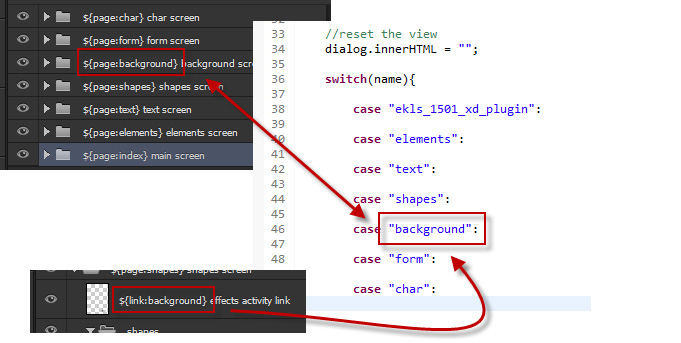
You can create an unlimited number of Screen Pages within your XD Plugin to further customize your export. Each Screen Page can contain a unique layout for optimal performance.
TIP: Your project and page names must start with
[a-zA-Z_]- letters and underscore only.
Link Screen Pages
Use our ${link} Tags to connect Screen Pages and allow the end-user to navigate your XD Plugin via native click actions. Links work with any PSD or AI layer and will navigate to the supplied Screen Page.
✱ NOTE: You do not need to add extensions to links, just use the Screen Page name.EXAMPLE: If you have
${page:plugin_home}then you can use${link:plugin_home}to connect the two.
Step 4: Update the Document Meta Info
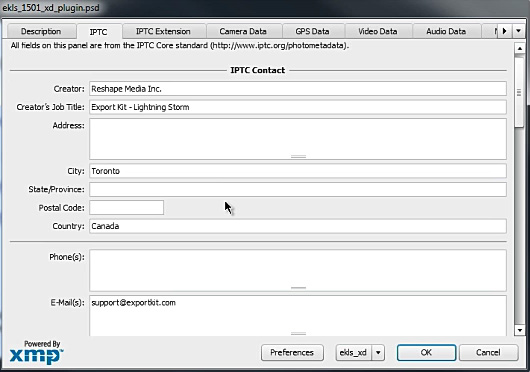
Your document meta is used in your XD Plugin output to name your application along with your plugin meta.
✱ NOTE: PressCtrl + Shift + Alt + ito access the document meta, or go toFile > File Info.
Step 5: Export
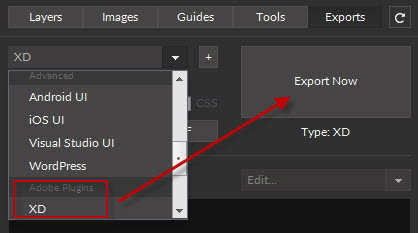
Export Kit allows you to customize your Output with Layer Options and Output Options before you export to personalize your project.
 TIP: XD Plugin Exports are pre-customized for the best output, options do not need to change.
Avoid Output Errors
Make sure you read and understand our Design Rules and Layer Naming Rules to avoid visual errors in your Output.
Make sure you read and go over our Before You Export Check List to avoid functional errors in your Output.
BUG:  Plugin not visible
FIX:  Use letters [a-zA-Z] and underscore [_] with your names
BUG:  Plugin screen pages did not load
FIX:  Add your main Screen Page with ${page:index}
BUG:  Output does not look like the design
FIX:  Use ${img} tag with problematic layers
Step 6: Copy the output folder

[YOUR_FILE]/ftml-www/adobe_plugin/xd/
Your output files are located in the same directory as your PSD or AI file. Copy the output folder.
Step 7: Paste into your local plugins path
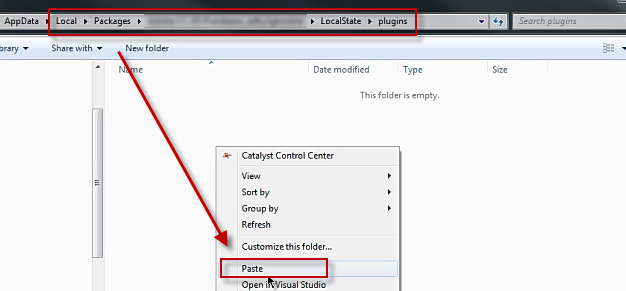
Paste your output folder into your local XD plugins directory to test.
 TIP: Refer to your XD Plugin Development documentation for the correct plugins path with both Win and Mac.
Step 8: Open Adobe XD and load the Plugin
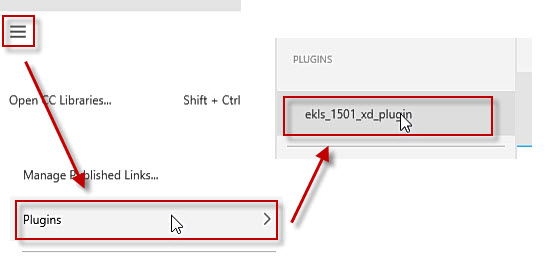
Once you open Adobe XD, navigate to File > Plugins > [YOUR_PLUGIN].
Example XD Plugin
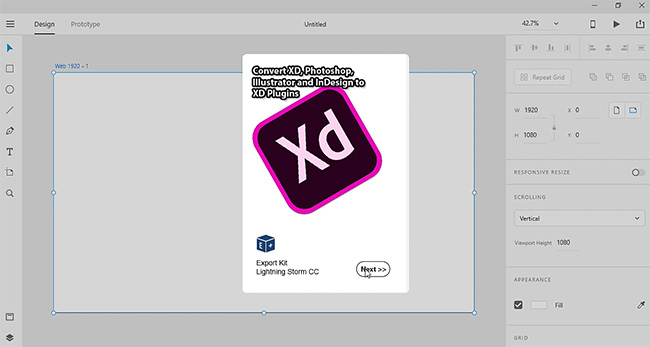
TIP: Use ${link} Tags to connect your Screen Pages.
TIP: A quick workaround to correct missing features is to use ${img} tag with the layer until the feature is supported, then re-export without the tag later.
Step 9: Modify the Code

Now you are ready to build your amazing XD Plugin. All your assets, elements and layouts are ready to go. Once your plugin is loaded and the UI is verified, you can begin to modify the code or take the simple approach and pass the code to a developer.


 Start saving time and money!
